
I want to start a movement! Let’s bring back the dying art of sending Christmas cards! Who’s with me? Why did we stop sending them? Too busy? Maybe you’re just uninspired by the hum-drum boxes of cards. Or maybe it’s because individual cards are so expensive! I buy my mom’s cards for her and I’m appalled by spending $5.99 for one card!! It makes her happy so I do it…but I tell her it’s under protest. 🙂 I think we should start our movement with sassy Christmas cards!
This post contains affiliate links. See our disclosure here.
The traditional Seasons Greetings and Peace on Earth cards are nice and can even be beautiful, and I will write a post to give you some ideas for those…but for this post let’s have a giggle. I’m going to show you how to make some sassy Christmas cards that to say the least are non-traditional. I admit they’re not for everyone. But don’t we all have a stressed out girlfriend who could use a laugh at Christmas? And they’re so much fun to make! It’s a win-win.
So let’s get started!
You might be a seasoned card maker, but for those who aren’t and would like to learn, let’s go through the process. The cards I like to make include stamped images that you color and my coloring medium of choice is Prismacolor Premier Pencils. If you’re just starting out, Prismacolor offers a set of 72 that has a great variety of colors for under $25. If you want to go all in, they also offer a set of 150 colors!
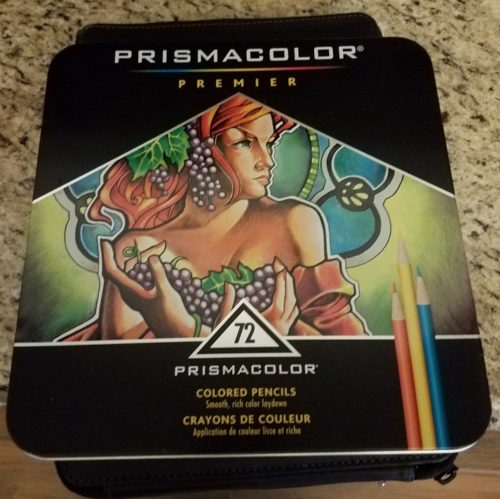
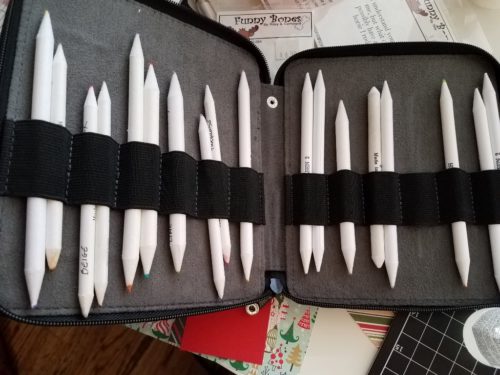
I used to store my pencils in the original tin…but you can only drop the tin so many times, complete with unladylike words, before you decide you need a new way to store them. I landed on a nice leather case that allows me to organize all my pencils in one place.
Gotta have some stamps!
Some of my favorite stamps are Art Impressions, Stampendous and Whipper Snapper. Stamps come in “mounted” and “unmounted”. A mounted stamp means it’s mounted on a wooden block. An unmounted stamp is just the rubber stamp with no block. For unmounted stamps you need an acrylic block to put the stamp on. I prefer acrylic blocks that have grid lines to make it easier to line the stamp up…but I’m getting ahead of myself.
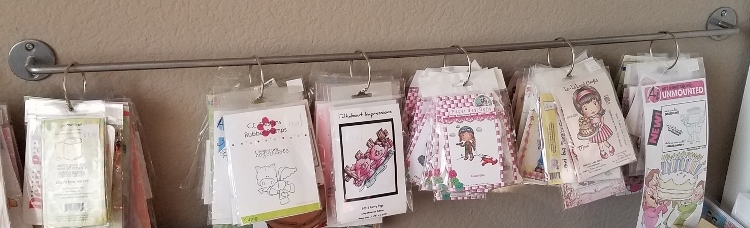
In a previous post I talk about organizing my craft room and I have found the best way for me to store my unmounted stamps is with a towel rod and large rings, like this:
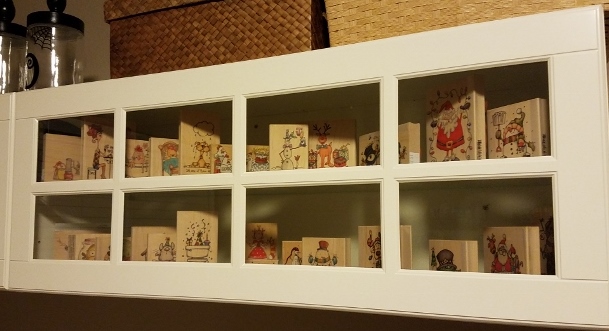
My mounted stamps are too pretty to store away so I have them in a glass front cabinet, like this:
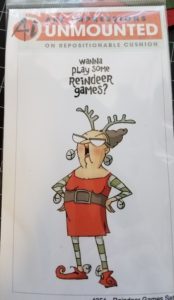
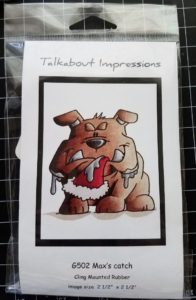
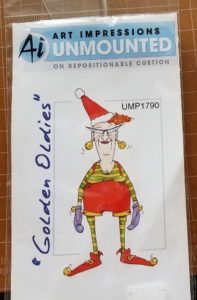
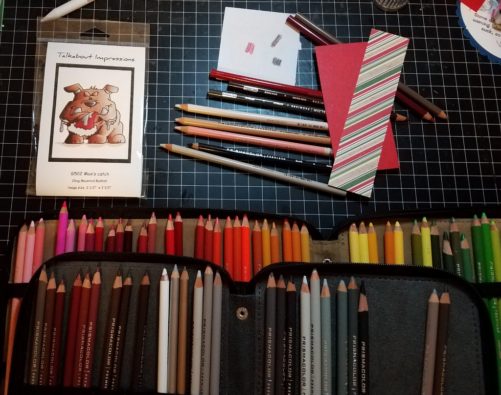
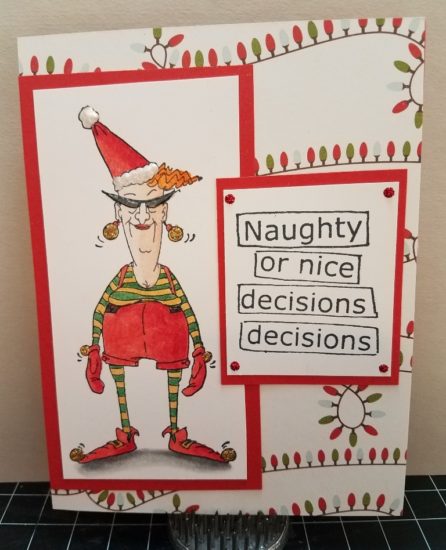
The stamps I used for the sassy Christmas cards in this post are Art Impression’s: Reindeer Games, Talkabout Impressions: Max’s Catch, and Art Impressions: Santa’s Helper – Eunice.
Not just any ol’ paper…
The type of paper you use is important for a sharply stamped image. You want the paper to be smooth and heavy. I use Hammermill 80 lb. paper.
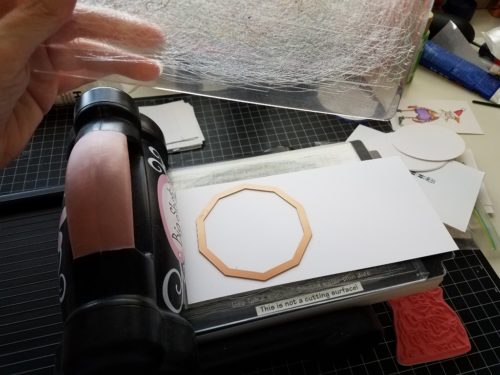
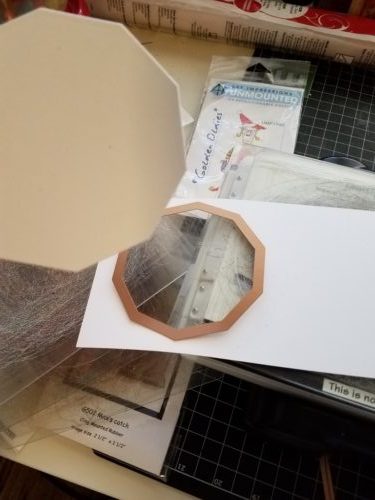
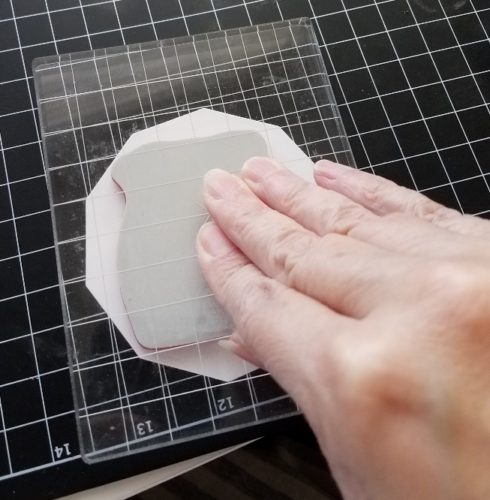
But the type of paper is only half the battle. Then you need to decide on the shape of your paper! Square or rectangle is the easiest, but if you really want to get fancy, you need a die cutting machine for the endless variety of die cuts that are out there. For the image below I used the Spellbinders Decagons die cut and my Big Shot die cutting machine. You just place the die on top of the paper, add the plate on top of that and crank it through the machine. Easy!
My ink of choice…
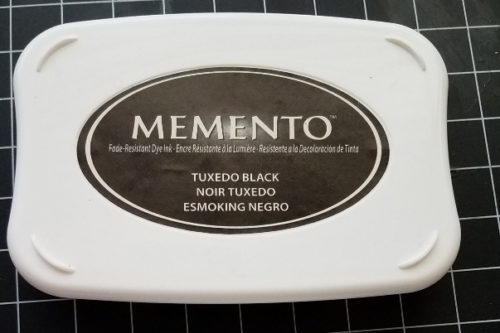
Now that you have your stamp and paper, you need some ink! My ink of choice is Memento in Tuxedo Black. It has a firm ink pad so when you’re adding the ink to the stamp you don’t get overflow into the crevices of the stamp. While I’m thinking of it, I also like StazOn stamp cleaner to clean the ink off my stamps when I’m done using them…
If you have an unmounted stamp, you’ll use your acrylic block in place of the wooden block included in a mounted stamp. You’ll need to peel off the backing on the stamp (but keep it because you’ll want to put it back on to protect the surface.)
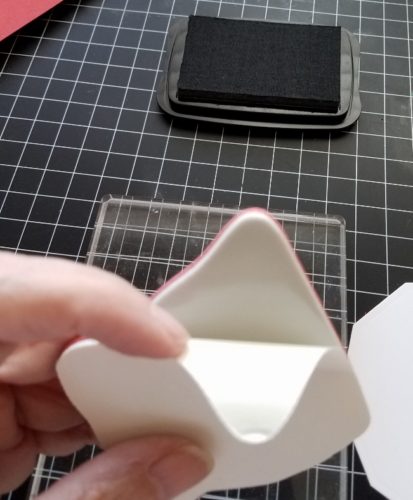
Place the stamp on the block using the grid to line it up, if you have a grid. If not, just eyeball it. Then tap the ink pad onto the stamp, until all of the raised edges of the stamp are covered in ink.
When the stamp is inked, it’s ready for the moment of truth! Stamping your image onto paper. Just line up your stamp to your paper, and press evenly.
This might be overkill, but I stand up when I’m stamping the image onto the paper. I feel it allows me a more even pressure.
Now my favorite part — coloring!
I have to credit much of what I’ve learned about shading and dimension from an incredibly talented artist, Jennifer Dove. She truly has a God given talent to see light in a one dimensional image. She’s annoyingly good. 🙂 Jennifer taught at the craft store I used to own and it was a pleasure to watch her grow into her own national brand! Her medium of choice is Copic markers. She teaches on her blog, plus locally in Arizona and she has a very popular Bootcamp that sells out every year! I encourage you to follow her blog at http://just4funcrafts.blogspot.com/. Looks like she has some sassy Christmas cards too!
Now it’s time to color this little guy! Oh wait…not just yet. Before you can start coloring there are a couple more things you’ll need… Mineral spirits (I prefer Gamsol), paper stumps , a bottle with a dauber top (I like the Stampendous brand) and a sandpaper file.
Also before I start coloring, I usually pick out my colors for the whole project, including the paper. But that doesn’t mean I don’t change my mind mid-project! Happens all the time… You’ll want to pick out 2-3 shades of the same general color for each section of the image. For example, for the Santa hat I chose two different shades of red, one darker than the other. I use a piece of scrap paper to look at the colors next to each other to see if they’ll work.
Okay, now it’s really time to start coloring.
I usually start by coloring everything on the image with the lightest shade of color. This is what it will look like. Not very inspiring…

Next I use my mineral spirits and paper stump to smooth out the color and get rid of the streaky pencil lines. Just dip the end of the paper stump onto the dauber until it’s saturated with mineral spirits and begin rubbing the paper stump onto the image. Be careful not to mix your colors. You don’t want to use a stump that was used to blend red on a beige section! I find it easier to have multiple paper stumps in different colors and sizes so I’m not constantly sanding off the last color I used. You can see here where I have multiple paper stumps labeled with the color they’ve been used for.
Look at what a difference the mineral spirits makes! Without any additional color added yet, it already looks so much better than the first image!
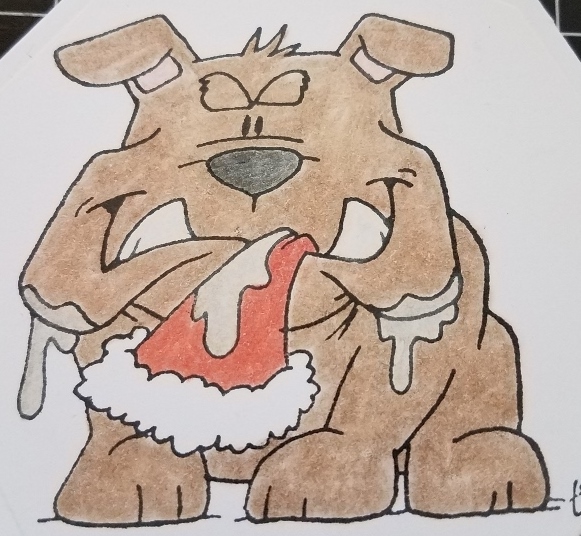
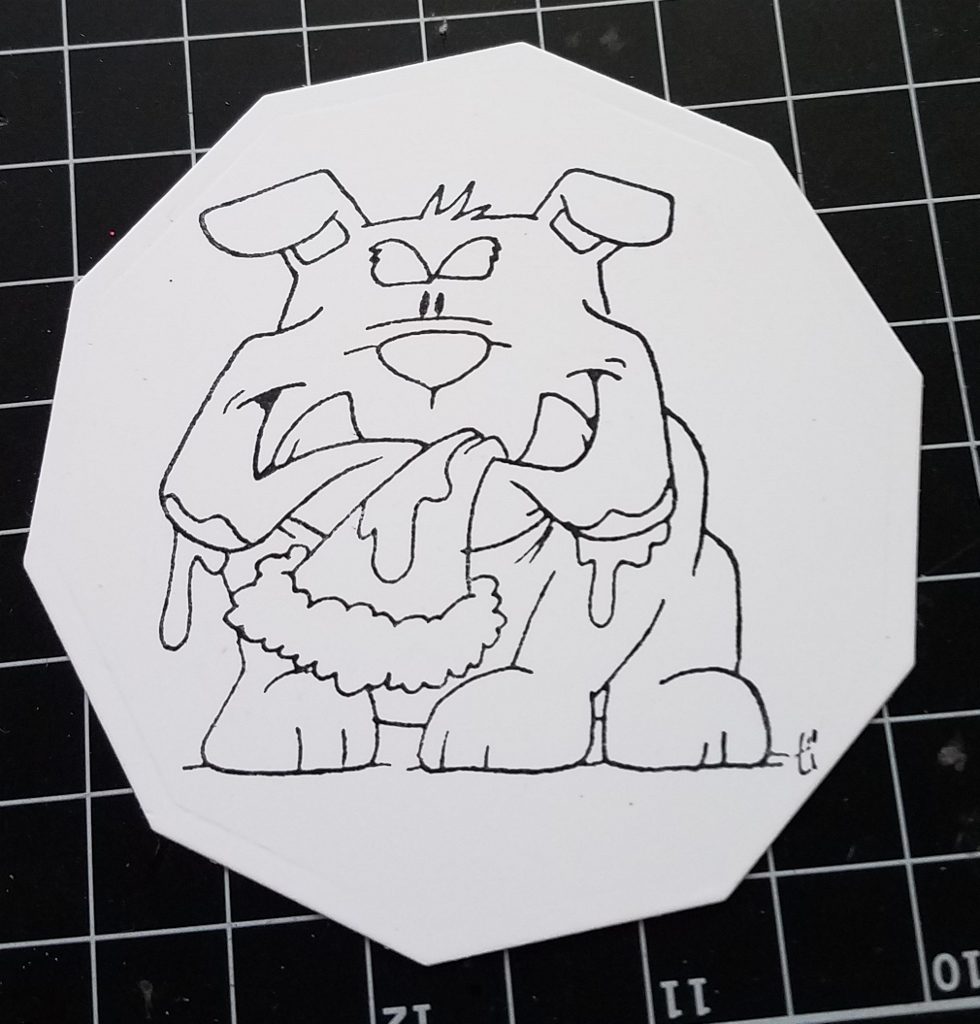
Next I start the blending, which seems to be the most intimidating part for most people…including me! If this doesn’t come natural to you, there is no shame in looking to see what others have done. Look at the cover art on the stamp packaging, go on Pinterest, Google it…whatever you need to do to push through! My friend Jennifer happened to create the cover art on the stamp of this little dog. Here you can see I took Jennifer’s queue and made the shade on the left side of the image. Use your darker pencil and just color in the areas you want shaded. Then go through the same process of blending it out with the mineral spirits.
I played with it for awhile and added more shading until I got the look I wanted. Here’s the final colors.
Time for the card layout!
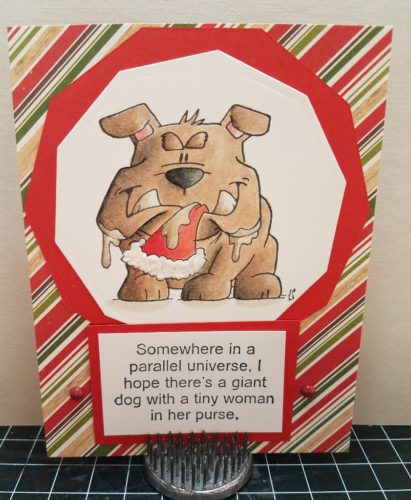
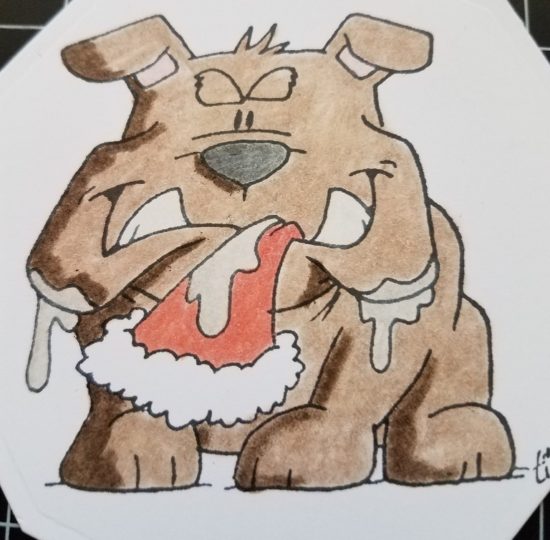
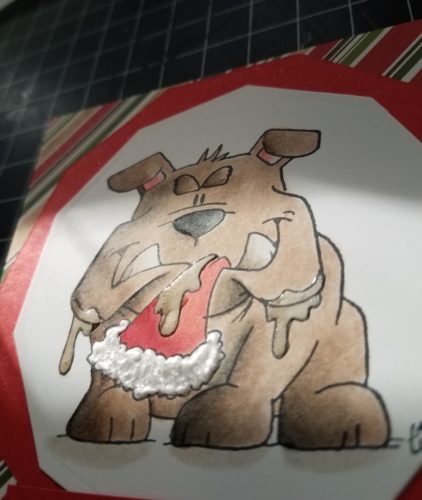
For my cranky little dog I chose a solid red cardstock for the card itself and then covered the card in a striped pattern from Echo Park – I Love Christmas I used my Spellbinders Decagon in one size larger to frame the image and just cut rectangles for the saying and frame. The saying itself isn’t “Christmasy”, it’s just a funny stamp from Riley & Co that fits the image of the cranky dog and makes for a sassy Christmas card! You can add your holiday greeting on the inside of the card.
![]()
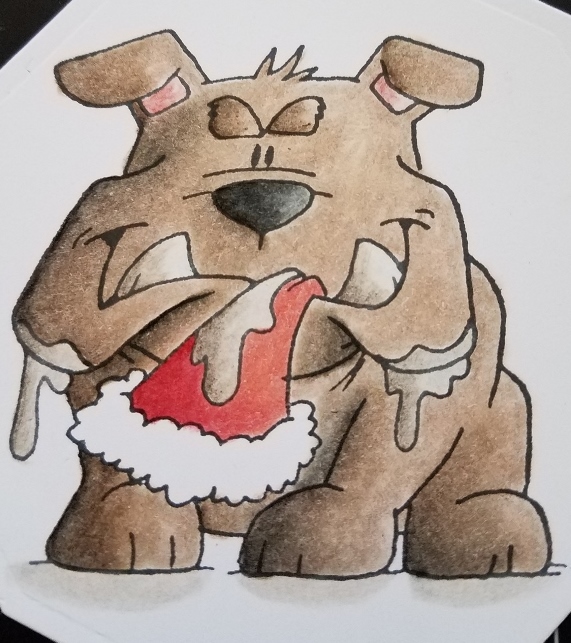
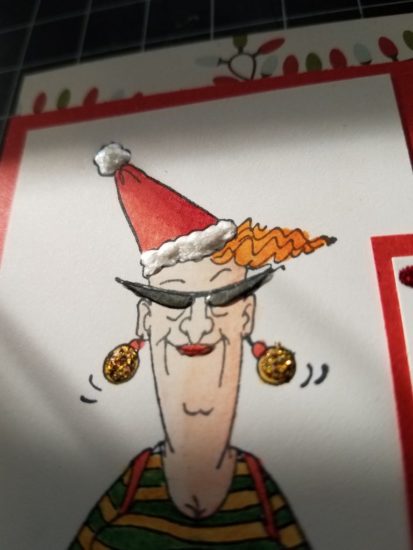
Once the layout was complete and everything was adhered together, the last thing I did was add the embellishments. I wanted to give him some texture so I used some White Opal Liquid Pearls for the white of his Santa Hat and some Glossy Accents for his slobber. I know…gross!
The textures are kinda hard to see in the photo above so here’s a closer look…
Wait, there’s more!
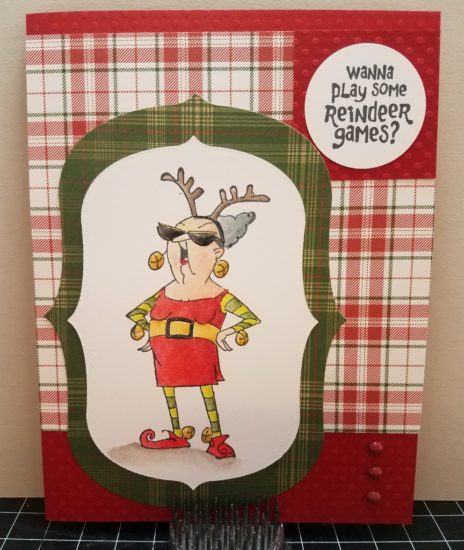
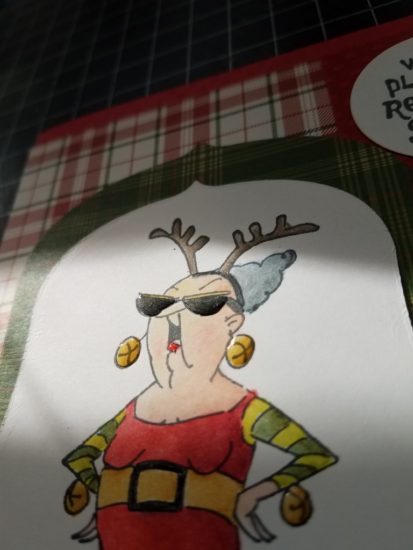
Using the same card making process above, I made two other cards. Here’s the first one:
For the paper I used Photo Play Paper – Mad 4 Plaid. I used the same Glossy Accents on her sunglasses, White Opal Liquid Pearls on her hat and Stickles in Goldenrod for her bells. Here’s more detail…
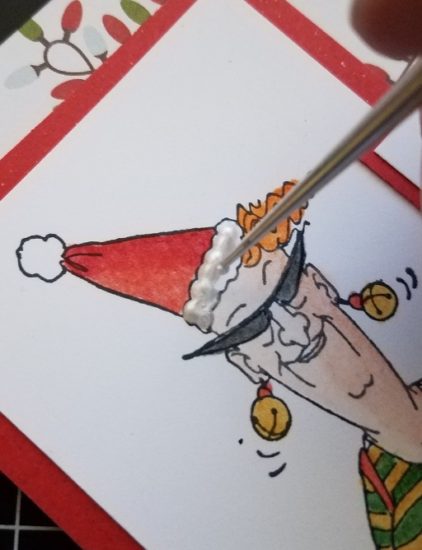
I just used a paper piercer to smooth out the Liquid Paper and make her hat look “fluffy”.
And the last sassy Christmas card I made was this little lady… I used Echo Park – Deck the Halls and Photo Play Paper – Mad 4 Plaid.
Again here’s some detail on her textures…
I hope you enjoyed my sassy Christmas cards and that you’ll join me in my movement to bring back Christmas cards!
Huh…I just had a thought. Maybe it’s not that people don’t send Christmas cards anymore. Maybe they’re just not sending them to me! 😯
Happy tinkering!
Susan
