
When I bought my fixer upper, the stairs were a disaster. It turns out they weren’t even up to code, but for some reason that little tidbit didn’t show up in the inspection. There were some trials and tribulations associated with updating the steps and railing so follow along with me as I chronicle the next area of my fixer upper – the stairs.
This post may contain affiliate links. See our disclosure here.
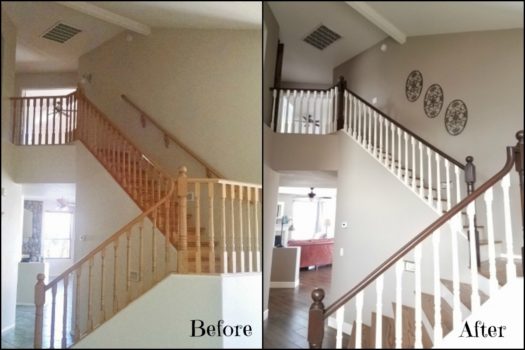
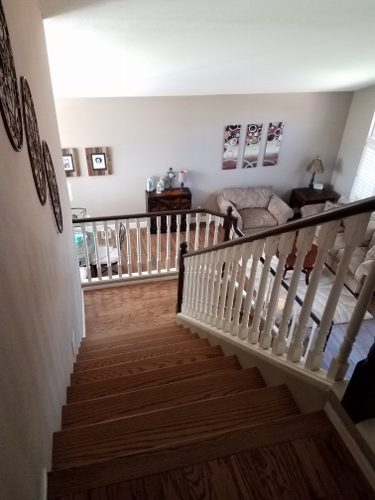
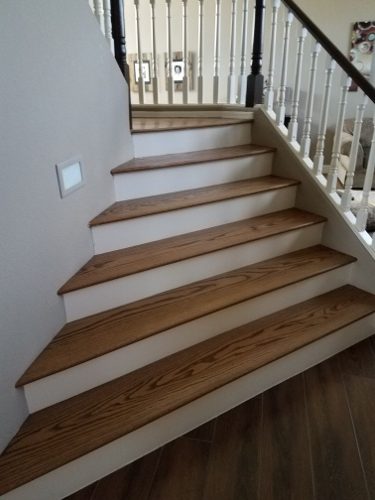
Before and after…
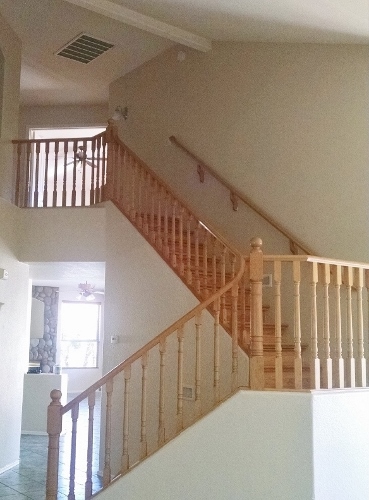
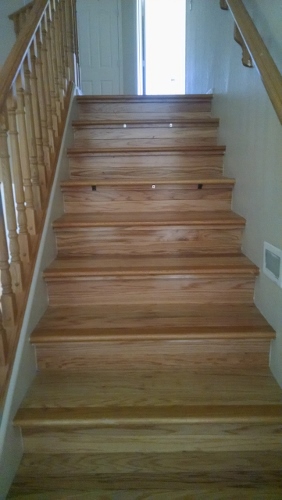
Below are photos of what they looked like before and what they look like now. (Ugh…I’m having flashbacks looking at those green floors!) It might not translate in the photos, but the treads were made out of thin strips of pine colored laminate with a wide bullnose piece on the edge. The bullnose edge was sticking out way over the stair base, so when you stepped on the tread there was nothing underneath the edge to brace it! Every time you walked on it, it made it a little weaker. Several of them were already cracking. Fixing them was a necessary and expensive evil because I figured with my luck I’d step on it wrong and go tumbling down the stairs. Huh…turns out that thought was a little too prophetic. I fell down those stairs after they were fixed and broke my foot in 10 places! It wasn’t the steps…it was simply my normal grace.
Decisions, decisions…
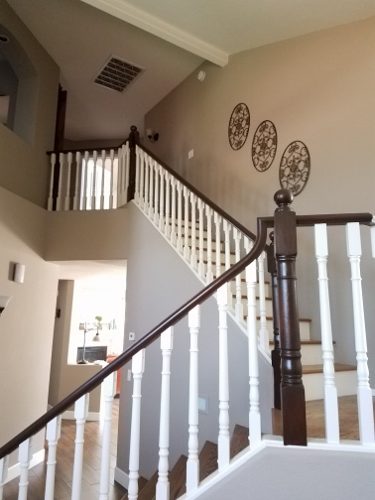
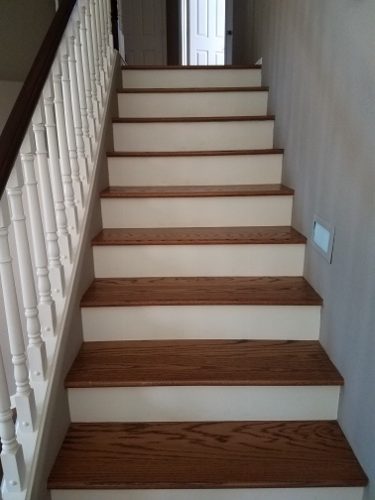
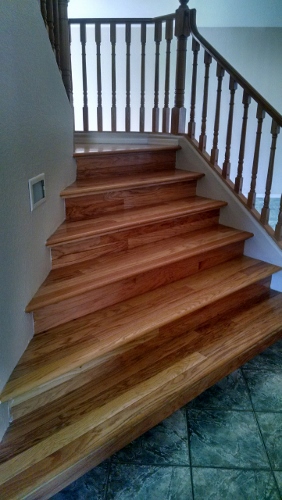
Since I had to replace the steps, I had some decisions to make. I found the right side railing on the way upstairs unnecessary so I just took that down. Then it was time to decide how I wanted the stairs to look. I knew I was planning to replace the downstairs flooring with walnut colored tile planks so I liked the idea of staining the railing and the steps with a dark stain. To go with that I decided to go with white risers and white spindles.
Replacing the treads and risers isn’t a job I wanted to take on myself so I consulted Angie’s List and selected a contractor. I have to be honest… I had mixed success with Angie’s List on this fixer upper. This contractor was tasked with replacing the treads and adding the white risers, and then staining the steps and railing in a walnut stain.
For the risers, he used a primed white poplar that you can find here at Home Depot. For the treads he used an unfinished red oak tread, again from Home Depot. That part of the project went fine, but then it was time to stain the railing…
Now I am all for shortcuts if they’re successful…but this contractor said he found a stain that requires no sanding. What? You’re staining over existing varnish on the railing and you expect it to adhere to the wood?? I told him I didn’t think it would work and he assured me it would. I think this might be the first time I didn’t enjoy being right!
Epic fail!
This is what happened…
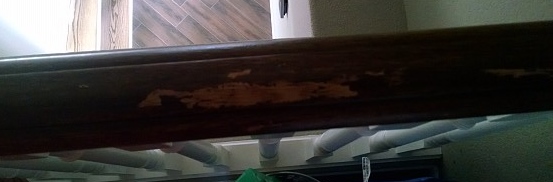
The new stain just peeled right off. And his remedy to fix it was to add more stain!! Aggghhh!!! Fast forward to me taking over the project and now having to remove about 5 layers of stain before I even got to the varnish of the original stain! After I sanded it all down I used the same process and same General Finishes stain that I used for the cabinet staining I shared in my Cabinet Staining blog post to complete the railing.
This contractor also stained the new treads he installed. I don’t know what stain he used, but I would not call the color walnut. It was lighter than I wanted. But I was afraid he’d keep adding layer upon layer of the wrong color so I chose not to fight that battle. It was the right color family so that was good enough for me.
Latex vs Oil Based Paint
Before I stained the railing I hired someone to sand and paint the spindles with Sherwin Williams Pure White (SW 7005). I hadn’t yet moved into the house and I had so many projects on my plate that it made sense to hire this out..not to mention I really don’t like painting spindles! Some people might disagree with the fact that I bought latex paint instead of oil based for this project, but I avoid using oil based paint whenever possible! It’s hard on your brushes, it has to be cleaned with mineral spirits and when you drip it (as I frequently do) the cleanup is unforgiving. I typically only use oil based paint for high traffic, high abuse areas like baseboards because it’s a more durable paint, but these are spindles. How much abuse will they endure!? Now I will say, if you have kids that hang from the railing on a frequent basis you might want to use the oil based paint. 🙂
Finally finished…
I think the stairs have been the most frustrating part of the whole renovation! Mostly because I had to take time away from other projects to undo the damage the contractor did on the railing. The finished look of the stairs is good but not exactly what I was going for. In a perfect world the treads would be just a bit darker. But overall I’m happy with the outcome, and in the big picture it’s so much better than it was!
Happy tinkering,
Susan
