

When I’m looking for new projects I love the unexpected and this is definitely an unexpected wreath. I saw this idea on a blog here and thought it was brilliant! I was so excited to put my spin on it and make one of my own. I already had almost everything I’d need for this project. All I needed to buy was the frame, the hanging hardware and a couple of ornaments.
This post may contain affiliate links. See our disclosure here.
On the hunt for a cheap frame…
My neighborhood garage sale happened to be coming up so I went in search of a frame. I found a 23×29 framed and matted picture for $2. Score! I just removed the picture and mat and cleaned the frame up a bit. It was the perfect size.
Shop your own stash…
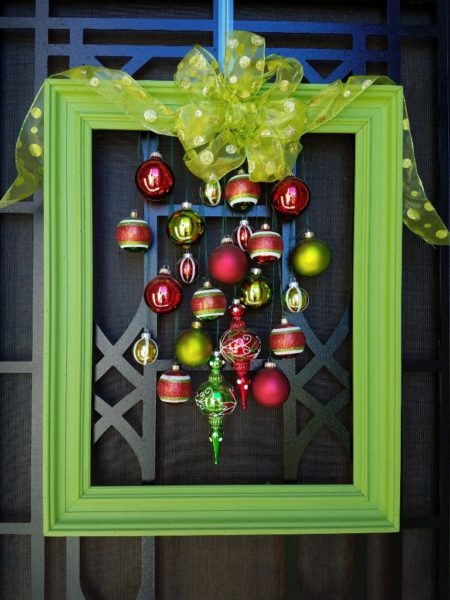
Then I went shopping in my own craft stash for some ornaments. I decided I wanted a fairly traditional red and green wreath, though I admit the frame color isn’t exactly traditional! I already had most of the ornaments on hand, but I didn’t want to use just round ornaments so I went out and bought a box of elongated ornaments at Walmart for $5.
You can see in my craft room https://thetinkeringspinster.com/2017/09/25/my-mostly-organized-craft-room/ that I have alot of ribbon! But I didn’t want the hanging ribbon to be a focal point so I chose a 1/8″ width in a dark green, hoping it would disappear in the background of my dark front door, leaving the ornaments to be the star of the show. For the bow I had a fun polka dot wired ribbon that I also had left over in my stash from a Hobby Lobby 50% off sale. If you don’t know how to make a bow, I went in search of a good tutorial for you and found a really nice YouTube video. She makes them the same way I do.
Putting it all together…
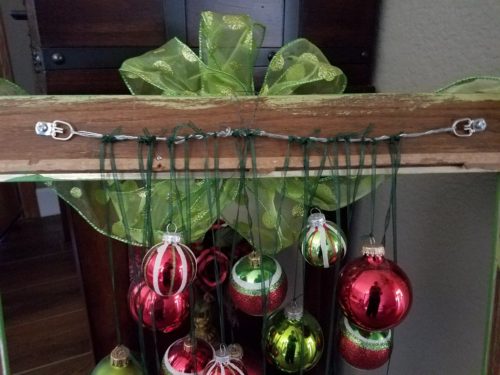
I wanted a matte look on the frame so I painted it a bright green with craft paint. Once it was dry it was time to get the frame ready to hang the ornaments. I bought a wire picture hanging kit that I found here at Amazon and strung the wire from one end of the frame to the other.
I laid out the ornaments inside the frame just for placement. I measured the length between the top of the ornament and the wire and added about an inch. That’s how much ribbon I would need for that ornament. Then I tied the ribbon to the ornament and clipped off the excess, and tied the other end to the wire.
To hang the bow, I used 24 gauge floral wire and wrapped it around the frame and the wire on the back of the frame. That helped secure the bow as well as the wire holding the ornaments. In the photo below you can see how it is raised a little in the center. Tying the bow to it ensured the center wouldn’t sag from the weight of the ornaments. Hmmm…you know the saying about not wanting to know how the sausage is made? Well, that kind of applies to the back of the frame when it’s all done. It’s not pretty…but it works great!
Oops…changed my mind.
Once the bow was secure I went back and did one last thing…and then forgot to take a photo of it! I had originally just made a loop out of the floral wire and that’s what I used to hang the wreath on the door (using a wreath hanger). That actually worked just fine, but then I got a little anal and wanted some added security so I went back and added a sawtooth picture hanger. If you choose to go this route I would recommend installing it before you hang any ornaments. It was a pain in the butt to do it afterwards! 🙂
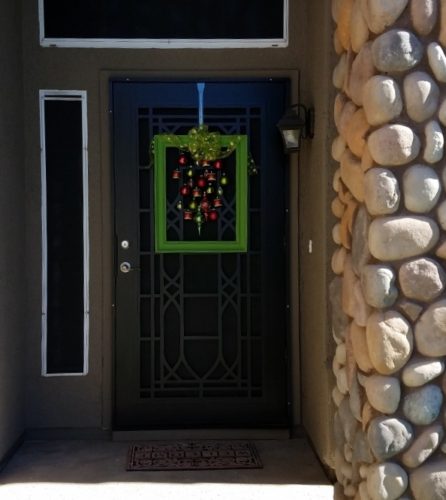
Here’s how it looks hanging on my door… It’s a great pop of color in an otherwise very beige entryway!
If you’d like an unexpected wreath on your door, here’s a recap of the supplies you’ll need:
- Wooden frame (size of your choice, I used 23×29)
- 1/8″ ribbon (I used about 5 yards)
- Wired Ribbon for the bow
- Floral wire to hang the bow
- Craft Paint in your choice of color
- An assortment of ornaments (I used about 20 ornaments)
- Wire picture hanging hardware kit
- Sawtooth picture hanger
- Wreath Hanger
I hope you enjoyed my unusual wreath. Let me hear from you.
Happy tinkering!
Susan
