

My brother has a pine tree in his yard and he recently asked me if I needed any pine cones for craft projects. It got me thinking…what could I make with pine cones? When he brought them to me it was too late to come up with a project for Christmas so I thought I’d try to figure out how to make a pine cone heart wreath for Valentine’s Day.
This post contains affiliate links. See our disclosure here.
Here’s what you’ll need:
- Artificial pine wreath
- Rust-Oleum Satin spray paint in Magenta, Colonial Red, Claret Wine
- Rust-Oleum Gloss spray paint in Berry Pink
- Pine cones
- Glue Gun
- Pruning Shears
- Scissors (for fussy cutting needles)
- Wire cutters
A little tip:
Walmart has great prices on their spray paint. And even better, they have joined the ranks of other companies like Home Depot that allow you to purchase your products online and they’ll have your order ready for you when you get to the store! Then you don’t have to run around trying to find someone to open the locked spray paint cabinet. Love that! Just click on the spray paint colors above and it will take you right to their products.
The prep work…
For the wreath itself, I had an inexpensive 8″ Christmas wreath left over from the holidays so I decided to see if I could bend it into a heart shape…and it worked!
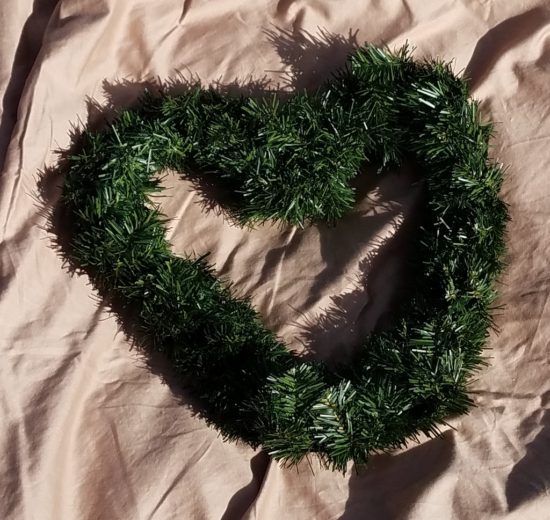
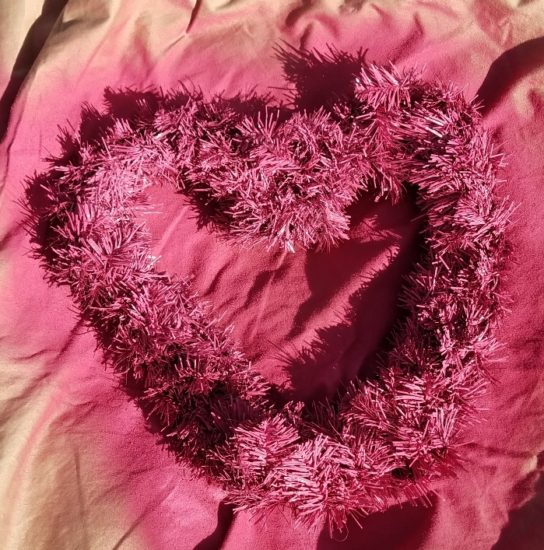
Then I spray painted the wreath with Rust-Oleum spray paint in Berry Pink. I should have trimmed away the unruly rows of needles that you see in the pic below before I sprayed, but I ended up just clipping them with wire cutters when it dried. By clipping them afterwards, the green of the wreath was exposed but they ended up being covered with pine cones so it didn’t matter.
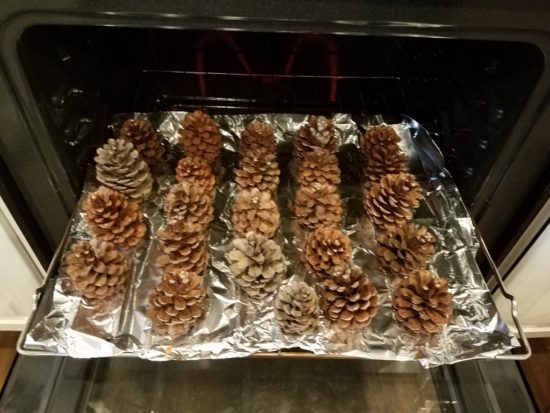
While the wreath was drying I got my pine cones ready. I did a google search about how to cut them and in that search I read that if you use pine cones for crafts, bake them first in case there are any little critters living in them. That freaked me out so just to be on the safe side, I baked my pine cones! One site said to bake them at 200 degrees, one said 250 degrees….so I split the difference and set the oven to 225 degrees. I lined the oven rack with foil and just put the pine cones right on the rack. Then I baked them for an hour.
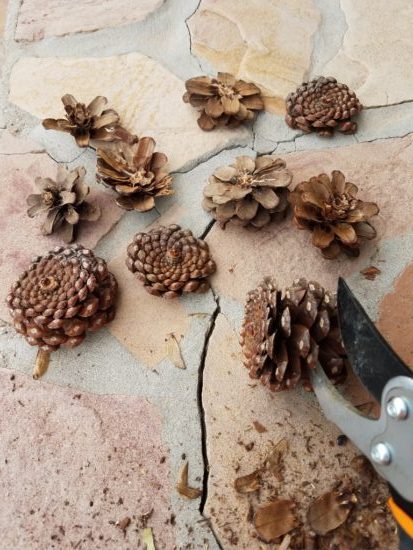
Once they were baked and cooled, I wanted to cut them into multiple pieces. This is where I wanted my original google search to lead me but I found suggestions like electric hand saws and having to put the pine cones in vices. Way too much work for my little brain so I got my pruning shears out and just experimented. I didn’t know if it would be messy, but I took them outside to cut them and I’m glad I did. Until I got the hang of it, pine cones were flying! What I originally got frustrated about is what I ended up liking about using the pruning shears. They don’t come out in neat little perfect cuts. Some are big, some little, some thin, some bulky…it was perfect! And some of the slices break but even that’s a good thing so don’t toss those out. When you’re assembling your wreath it’s good to have small, uneven pieces as filler.
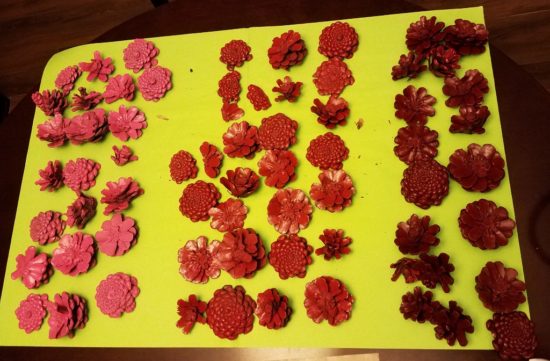
Next thing I did was spray paint the pine cone pieces in three different colors: Rust-oleum Magenta, Colonial Red and Claret Wine.
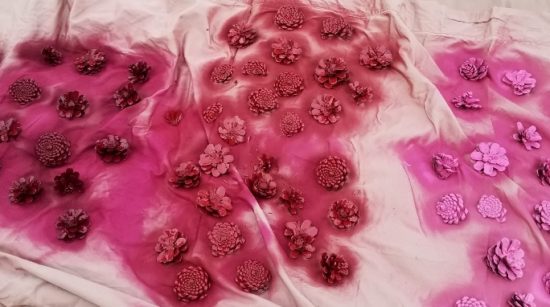
Once they were dry I laid them out on a table by color. Then it was time to put the whole thing together!
An easy way to start…
In laying out the design, an easy way to start is to picture an imaginary triangle on top of the wreath. Now pick the lightest color and place it at each tip of the triangle. Glue the pieces down. Now place the second lightest color to the left of the first pieces and glue those down. Then just place the darkest color to the right of the first pieces and glue those down too. Now just build from there. Move the “triangle” to another part of the wreath and repeat the process. Because the wreath has dimension, add pine cone pieces to the inside and outside of the wreath, not just the top. This is where those little broken pieces come in handy. They’ll fit into small spaces where there are gaps.
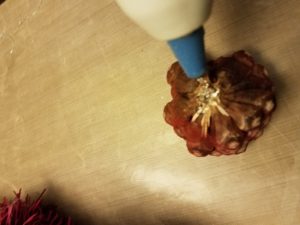

Once all the pieces were glued on, the last thing I did was fussy cut any little pine needles that were sticking out too much.
And that’s it! It was easy and fun to make. I hope you enjoyed this little pine cone heart wreath project. Send me a pic of how yours turns out.
Happy tinkering,
Susan
