
I’ve been slowly transforming one of my guest rooms into a cozy rustic retreat and it was time to focus on nightstands! With a DIY headboard already complete and the walls nearly painted, I was ready for a budget-friendly furniture project that would tie the whole look together. That’s how I ended up with an Ikea Nightstand makeover!
This post contains affiliate links. See our disclosure here.
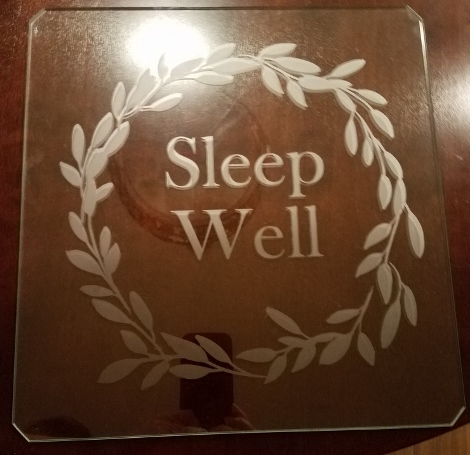
I was originally thinking just some inexpensive pine nightstands that I could stain but when I saw these nightstands at Ikea, I immediately thought…etched glass! Follow along as I show you how to transform $15 nightstands into works of art!
Safety first
Etching cream is pretty easy to work with but there are some rules to it. When you think about what the etching cream is doing to glass…you don’t want that same thing to happen to your skin! So always use gloves. And it’s always a good idea to use protective eyewear too. Once you’re all safe, here is how to do your own IKEA nightstand makeover.
What you’ll need for the nightstand makeover
2 – NESNA Nightstand
2 – Stencils
1 – Craft Tweezers
2 – Craft Sticks
1 – Painter’s Tape
2 – Cotton Rags
1 – Stopwatch (I just use an app on my phone)
How to etch the glass panels
- Cover the surface you’re working on with a dropcloth.
- Don’t assemble the table yet. It’s easier to stain and etch as individual pieces.
- Clean the surface of the glass with isopropyl rubbing alcohol. I actually didn’t have any on hand so I used Fabuloso (which I love!) and it worked great, but some cleaners leave a residue that repels the etching cream.
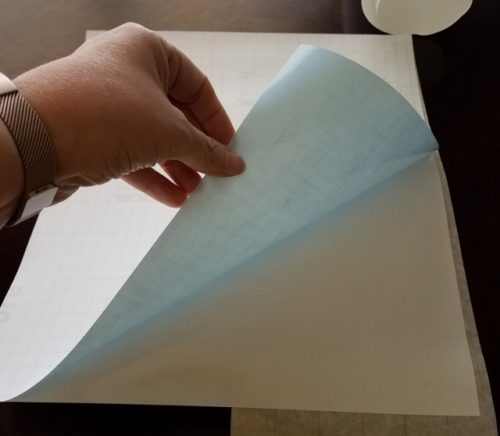
- Cover the front of the stencil with the transfer tape. The easiest way for me to do it is start at one end and stick down the edges, then move down the stencil, smoothing out the transfer tape while it’s still on the roll until the whole stencil is covered. Then just cut the used portion from the roll.
![]()
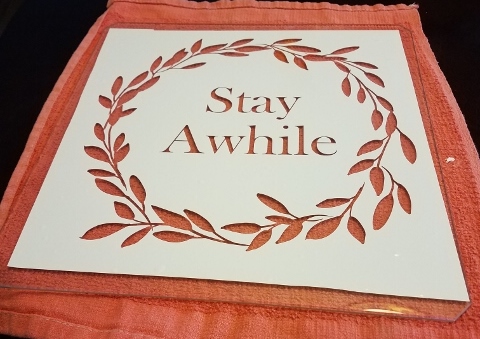
- Remove the backing from the stencil and center the stencil on the glass. Smooth out any big air pockets.
- Using tweezers, remove the pieces of the stencil that are to be etched.
- Check to make sure there are no air pockets in the areas where the cut out is. The etching cream could get under the stencil and you’ll lose your sharp lines.
- Cover the edge of the glass with painter’s tape. (You’ll see in the photo I didn’t do this. Learn from my mistake! Some etching cream got on the glass and stained it! Grrr…..)
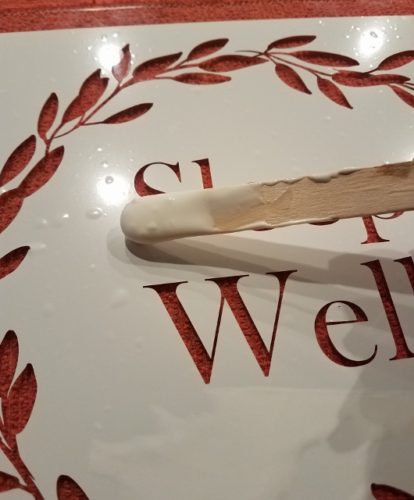
- Using a craft stick, stir the etching cream. There will be crystalized chunks in it. That’s normal.
- Start your stopwatch and start adding the etching cream to your stencil, thick enough to where you can’t see the pattern underneath it.
- This is what it will look like covered with the etching cream.
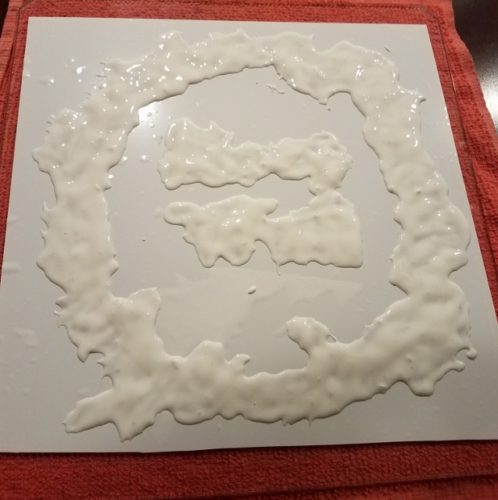
- At 3.5 minutes, even if you’re not done covering the entire piece, go back over the area you’ve already covered, moving the cream around to make sure the crystals don’t settle into one place.
- Continue adding the cream until the entire thing is covered. Again, move the cream around at about 3.5 minutes in the areas you applied after the first 3.5 minutes. I know this sounds confusing. The idea is to just take your craft stick and lightly “stir up” all areas where there is etching cream after the cream has been sitting in that area for about 3.5 minutes.
- I think the bottle says the glass is etched after one minute but that’s not nearly enough time. It’s a minimum of 5 minutes but because you’re working with a large area it will take longer than 5 minutes. The whole thing took me about 12 minutes from the time I started adding the cream to when I was done stirring up all the areas and was ready to rinse.
- Still wearing your gloves and before you remove the stencil, rinse all the etching cream from the glass with warm/hot water. I have a stainless steel sink but I read that you need to be careful with porcelain sinks when using etching cream. You might want to rinse outside or in a bucket.
- Remove the stencil from the glass and throw away. Give the glass one more rinse and dry with a paper towel or cotton cloth.
- All done!
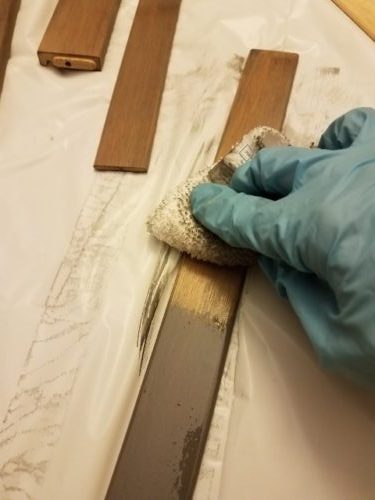
How to Stain the Wood for a Rustic Look
- Cover your working area with a dropcloth
- Put your latex disposable gloves on.
- Using the Minwax Classic Gray stain and a foam brush, apply the stain to each piece of wood.
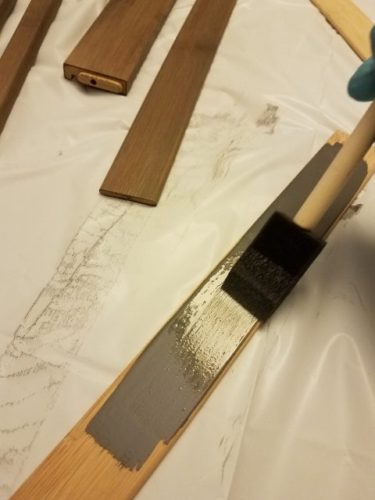
- Immediately wipe off with a cotton rag.
- Continue this process until all pieces are stained.
- On a few pieces of the stained wood, add Minwax Dark Walnut stain over the Classic Gray and immediately wipe off. This will give you a contrast in the overall nightstand and make it look more rustic.
- The stain takes awhile to dry so it’s best to let it dry overnight and then assemble the table the next day. The table is really easy to assemble — not like some other IKEA furniture!
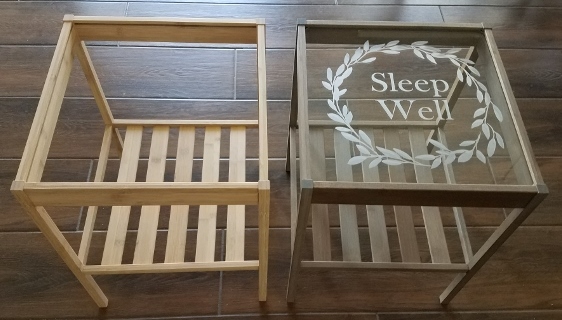
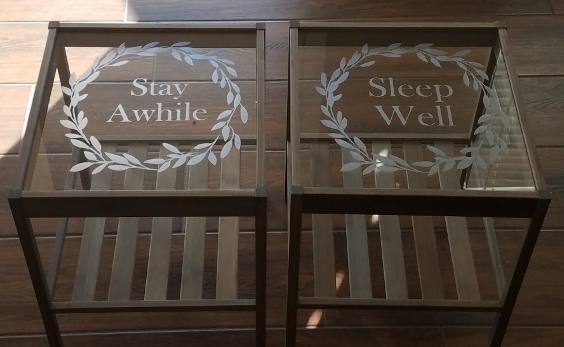
The Final Reveal
Rustic Room Accessories I Love
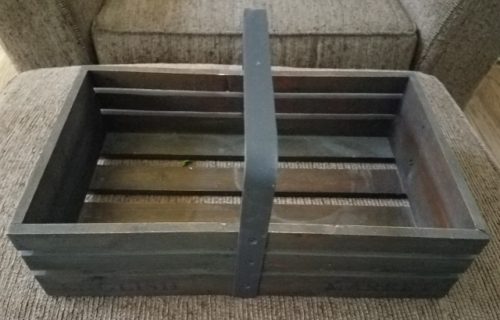
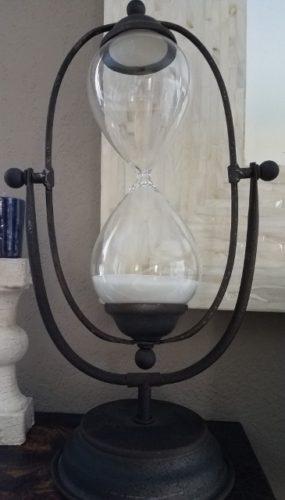
Now that these nightstands are done I’ll be focusing on accessorizing the room and I am completely addicted to a company called Decor Steals! Are you familiar with them? You can sign up with them and they’ll email you a “deal of the day” and every morning you’ll find anything from a table to a candlestick in your email. The prices are really reasonable and the quality is great but the deals are only around until they sell out. Sometimes that’s within hours and sometimes it takes a few days.
If you like rustic/farmhouse you will thank me…or hate me if you end up spending too much money. 🙂 Here are a couple of things I’ve purchased from them…
This easy IKEA NESNA nightstand makeover turned out better than I imagined—etched glass adds such a custom touch! If you’re craving rustic charm on a budget, this project is simple, customizable, and super satisfying.
I hope you’ve enjoyed my Ikea Nightstand Makeover. Now I have to go finish painting the room so I can put it all together!
Happy tinkering,
Susan
