
I recently bought a house in the Phoenix area and boy did it need work! The house was built in 1969 and for the most part it looked like it had never been remodeled…which is my favorite kind of house. It needed alot of love, so I started by remodeling the guest bathroom. Fortunately I was able to remodel the house before I moved in. Follow along my journey as I share the details of each room, my design selections and the budget.
Cost-Saving Tips I Swear By
-
Rakuten for cash back. Check out my post on Rakuten
-
American Express Points (or the credit card of your choice) for perks and future purchases
-
Interest-free credit cards when possible
-
Home Depot Pro account for discounts and point perks
- Shop for Sales
You will quickly notice in this remodel that I’m not an upscale kinda girl. A great deal of my remodel was purchased from Lowe’s and Home Depot. I like pretty things but have never felt you have to pay an exorbitant amount of money for pretty. I look for ways to keep the costs down without sacrificing the look I’m going for. And in the list above you’ll see I use every cost savings trick I can find!
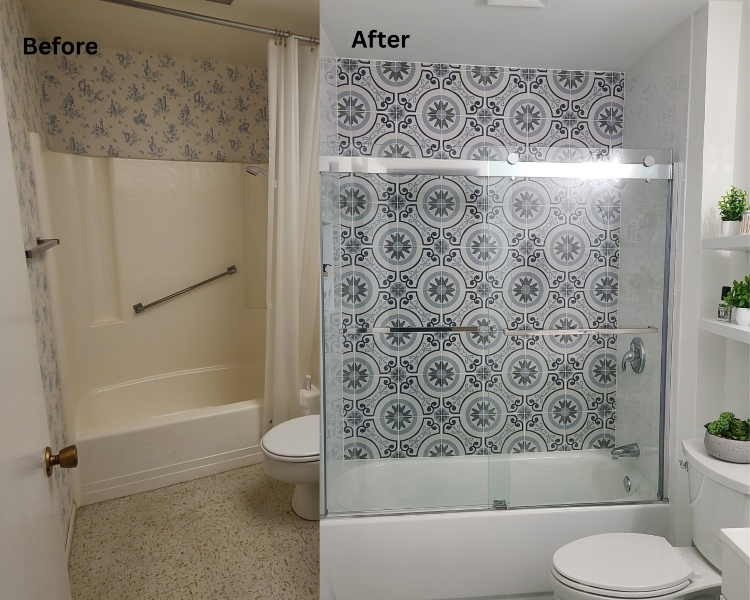
Remodeling the Guest Bathroom – Before and After
I chose the guest bathroom as the starting point of my remodel for a few reasons.
- It was the smallest room in the house
- It allowed me to test out my contractors to see if we were a good fit
- It was the one room that benefited everyone working or visiting during the remodel!
When I start a remodel, I think about where to spend the bulk of the money. I try to spend it on impact items if possible. For a guest bathroom, that is the flooring and shower tile for me. And because I wanted the tile to be the focal point, I wanted a glass door instead of shower curtain.
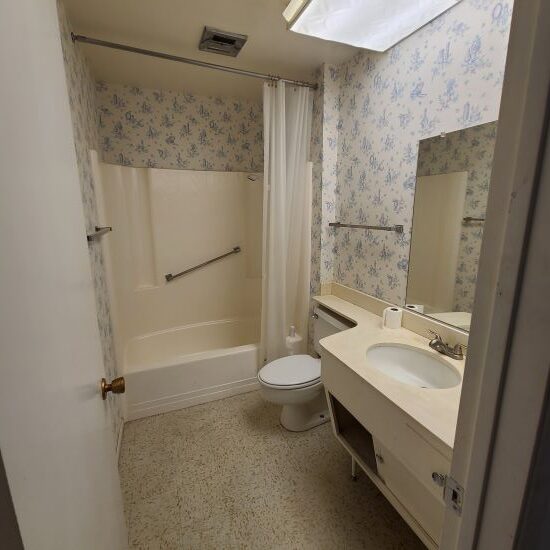
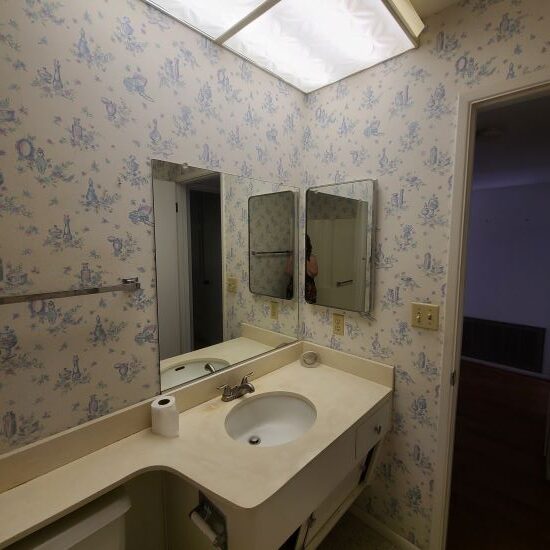
This is what the bathroom looked like when I started. Pretty, right? 🙂
Budget and Shopping List
When I remodel a room, I like to have a vision before I begin. I already knew the look I was going for, and just had to find the right materials.
For the bathroom, the essential remodel items I needed are:
- Flooring
- Vanity
- Mirror
- Light
- Faucet hardware
- Tub
- Shower door
- Shower hardware
- Toilet
- Paint
- Accessories
My budget was $5,000. How did I come up with that budget? Just ballparking based on small bathroom remodels I’d done in the past.
Flooring/Tile
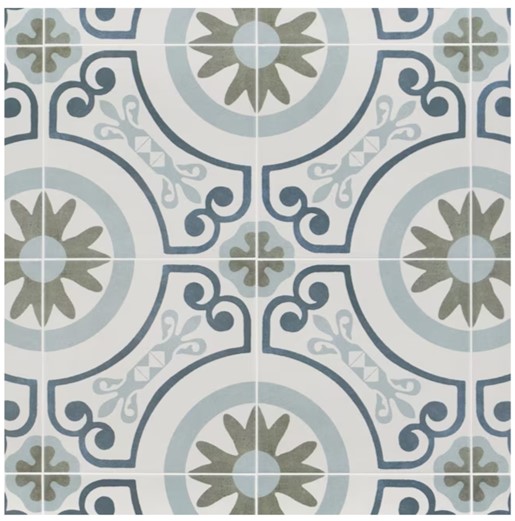
I’m a fan of encaustic tile. The patterns are bold and fun and I especially like them for backsplashes and bathrooms.
This is the encaustic tile I chose for my current remodel.
You can see I created the same look of the encaustic tile on the floor and up the back wall in both projects, to make the tile the focal point. The opposite walls were white tile and paint.
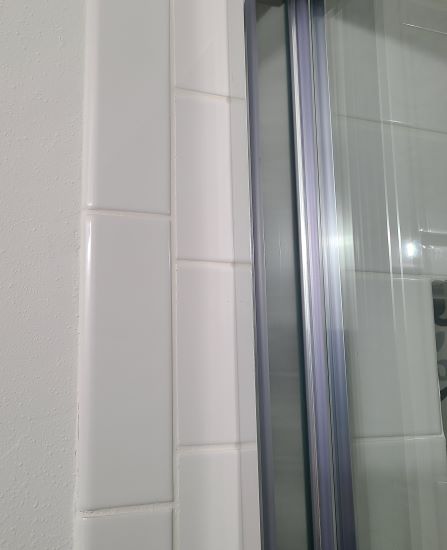
I chose a plain white 4×12 tile with a row of bullnose on the edge, for the other two bathtub walls.
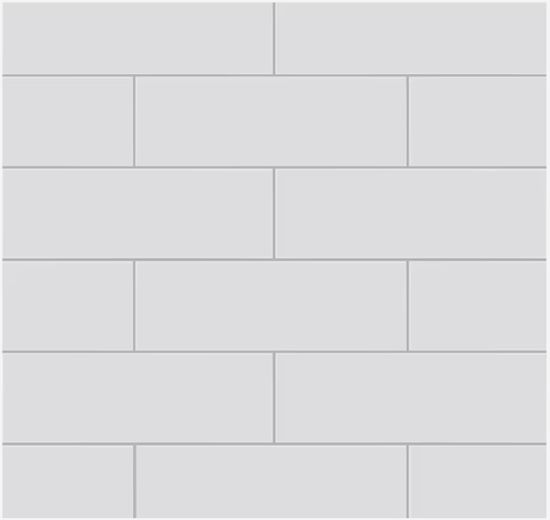
The bullnose was 2×6. Here’s what it looks like close up.
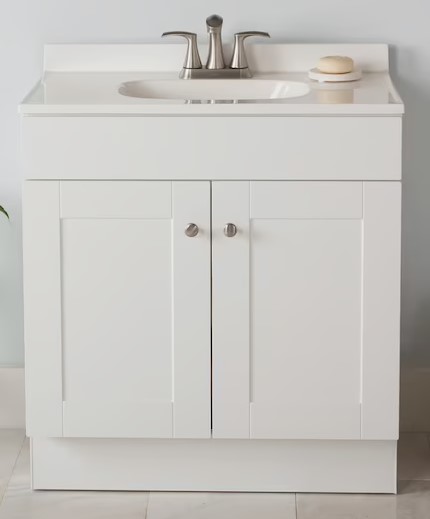
Vanity
Here’s one I’ll chalk up as a lesson learned. I measured the distance between the toilet and the wall, to determine the width of the vanity I’d need. 36″ seemed to be too tight, so I ordered a 30″. After it was installed, I realized I could have gone with the 36″.
Yes, it would have been a little snug but there isn’t typically much room between the toilet and vanity in most bathrooms with that layout. 30″ is a pretty small vanity and it would have been nice to have a bit more counter space, but oh well. I’m moving on.
Here’s the vanity I ordered.
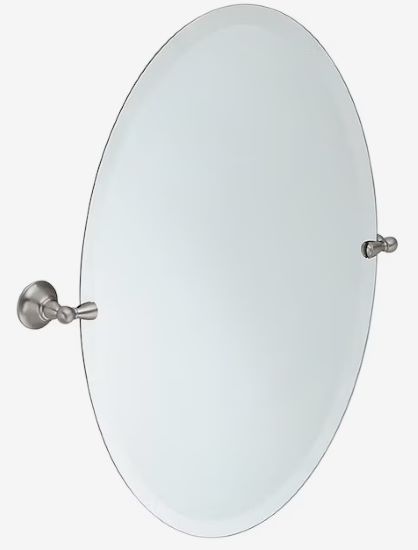
Mirror
I wanted a mirror that was a little different so I went on lots of websites to get ideas. I ended up with a frameless oval mirror that works great with my small vanity.
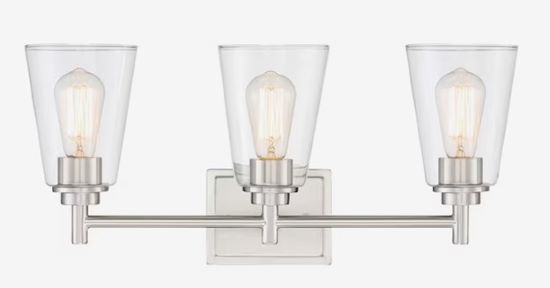
Light Fixture
I didn’t want anything too ornate for the light fixture, so I chose a simple brushed platinum, 3 sconce vanity light bar. I actually hung it with the sconce opening down instead of how it’s shown in the picture. I’m a rebel. 🙂
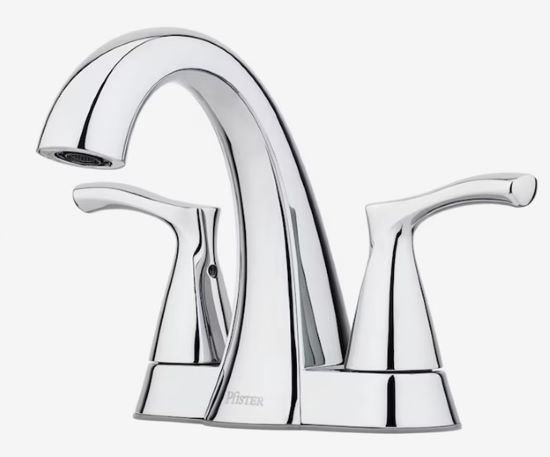
Sink Faucet
I don’t spend a great deal of time picking out the faucets. Yes, there are beautiful, sophisticated faucets to choose from but the aesthetic of the bathroom isn’t sophisticated so simple is better for me. I just chose a plain ol’ Pfister.
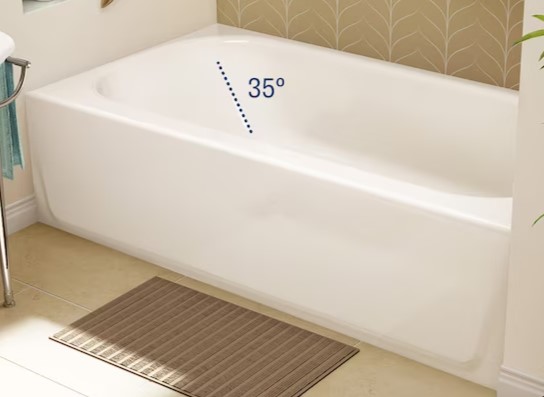
Tub
Alot of times when you’re remodeling the bathroom you don’t have to replace the tub. In my case, the original tub was part of a full fiberglass surround and I just wanted a stand alone tub so I had to rip out all the original and replace it with a tub.
Here’s another case where I could have spent the extra money for a fabulous claw foot tub, or the like, but there was so much to be remodeled in the whole house that I wanted to keep the costs down. I opted for a plain porcelain tub.
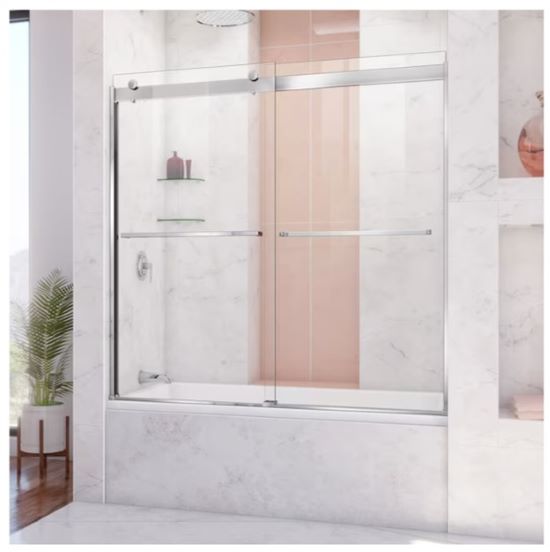
Bathtub Door
Here’s where I could have saved money but opted to spend the extra. A glass door would show off that beautiful encaustic tile I just spent money on I didn’t want to cover it up with a shower curtain! So here is the bathtub door I chose.
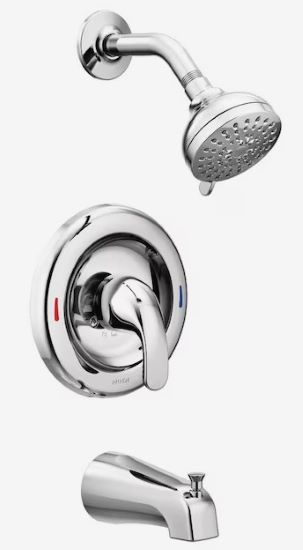
Tub/Shower Faucet
Again, this is an item I don’t spend alot of time and money on. I opted for a simple design for my bathtub hardware.
Toilet
Here’s another item that can be big-ticket, or can be plain. You can get a heated seat, bidet-like features, remote control…but it’s a toilet! Here’s the toilet I purchased.

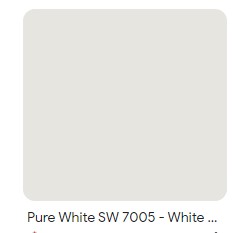
Paint
I’m a Sherwin Williams girl, and for this remodel I chose Pure White.
Accessories
Now here’s where the fun really starts…accessories!
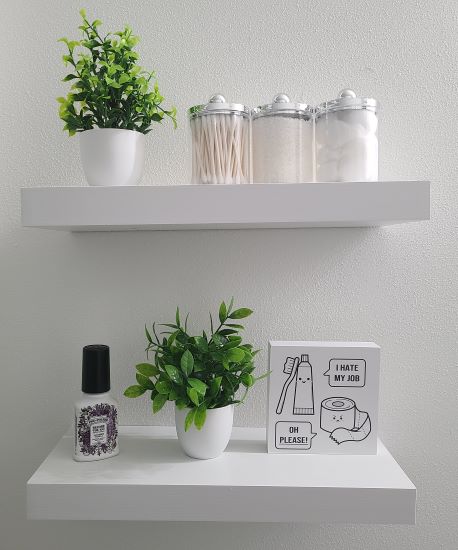
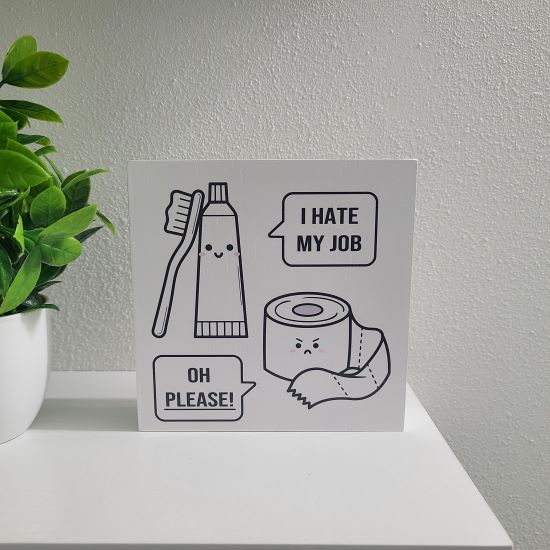
I like a little kitch in my house…sometimes inappropriate…so loved this sign. 😆
Here are the accessories over the toilet I purchased for the bathroom…all at Amazon.
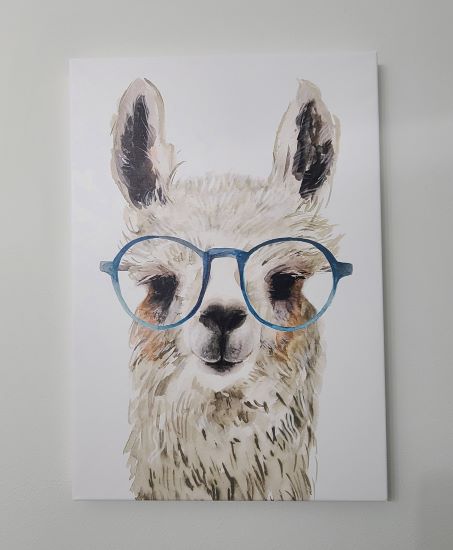
On the opposite wall, I wanted a fun piece of art. Not everyone’s taste but it was kitchy and spoke to me. I got it at At Home but I don’t see the same one on their website anymore. Here’s a similar one.
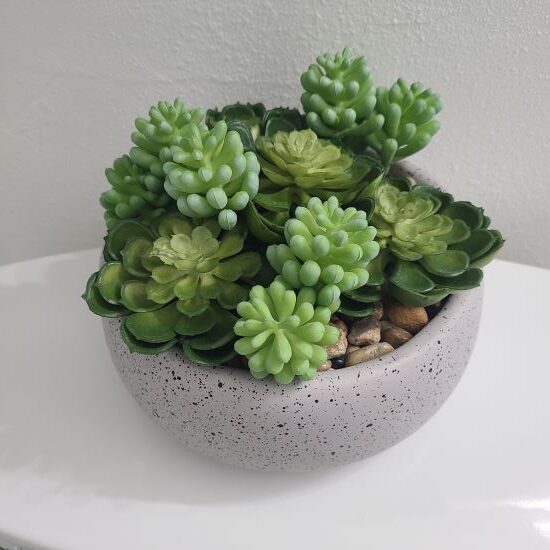
On top of the toilet I put a pretty succulent that I also got at At Home.
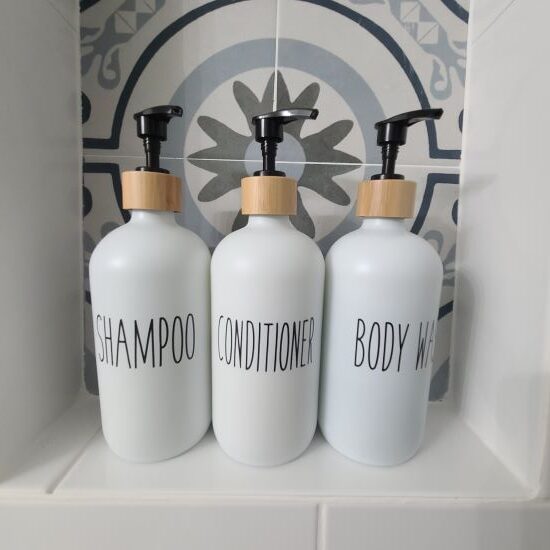
I had them add a niche to the side wall of the tub so I could store shampoo and things. Here are the cute bottles I found to go in there.
Budget
It turns out my budgeting wasn’t all that great! I budgeted $5,000 and it cost $6,500. Some of the overages was having to re-plumb the room. Because it was a 1969 home, I probably should have factored that in. Another reason for the overage is I didn’t consider how much more expensive things are post-Covid. It ended up being an additional 20% or so. I’ll know next time!
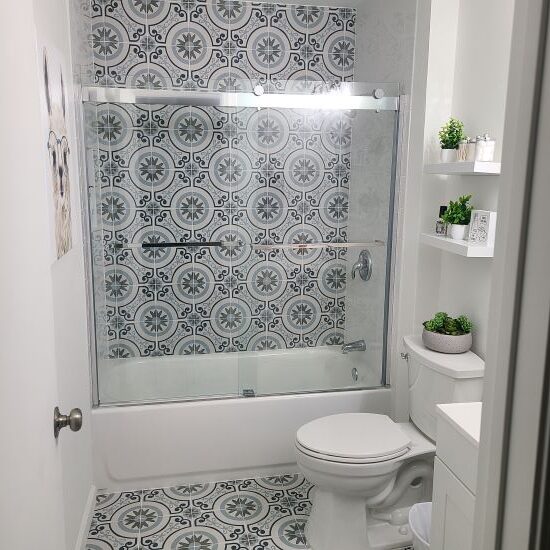
So here is the end result.
I hope you enjoyed out time together, remodeling the guest bathroom. On to the next room!
Happy tinkering,
Susan
