
What is Fantasy (ish) Maple Nut Fudge? Well, Fantasy Fudge is the name of the fudge recipe that has been on the side of the Kraft Jet-Puffed Marshmallow Creme jar for many years. For the most part, the recipe has remained unchanged over the years. They added some brand suggestions in the ingredients and reduced the stirring time but there haven’t really been any drastic changes over the years. Fantasy Fudge is pretty much a no-fail recipe. No candy thermometer, no complicated steps…just simple and perfect every time! I made this recipe alot during the holidays when I was a young girl. What made me think of it this weekend is it’s Mother’s Day and my mom’s favorite fudge is Maple Nut. I don’t have a recipe for Maple Nut Fudge so I thought I’d try to adapt the Fantasy Fudge recipe (since it’s so easy to make). This could turn out really well or go very wrong. So follow along as I attempt to make Fantasy (ish) Maple Nut Fudge!
Note: Click on the link to find a second version of this recipe. If you like a mild maple flavor, the recipe on this page is the one for you. If you like a stronger maple flavor, follow this link: https://thetinkeringspinster.com/fantasy-ish-maple-nut-fudge-2-0/
Changes!
The original Fantasy Fudge recipe calls for semi-sweet chocolate chips. I obviously don’t want chocolate in my maple fudge so I’m going to substitute white chocolate chips. Sounds reasonable, right?
It also calls for vanilla extract. I guess I could add vanilla extract as well but because I want it to have a maple flavor I am going to omit the vanilla extract and add maple extract. But I’m thinking since the vanilla is just a flavor enhancer whereas the maple extract will be the main flavor profile I’m going to add more maple extract than the 1 tsp vanilla extract from the original recipe.
You’d have to be in my head to see where my logic comes from…but I’m thinking of adding salt to the recipe! Caramel and salt go together so well. And maple and bacon are a trendy combo. So salt just sounds logical. I will probably error on the side of less, though. Mostly because I have to deliver this fudge today so it has to be edible! Note: I decided to add the salt after I took the picture. 🙂
Here goes nothing!
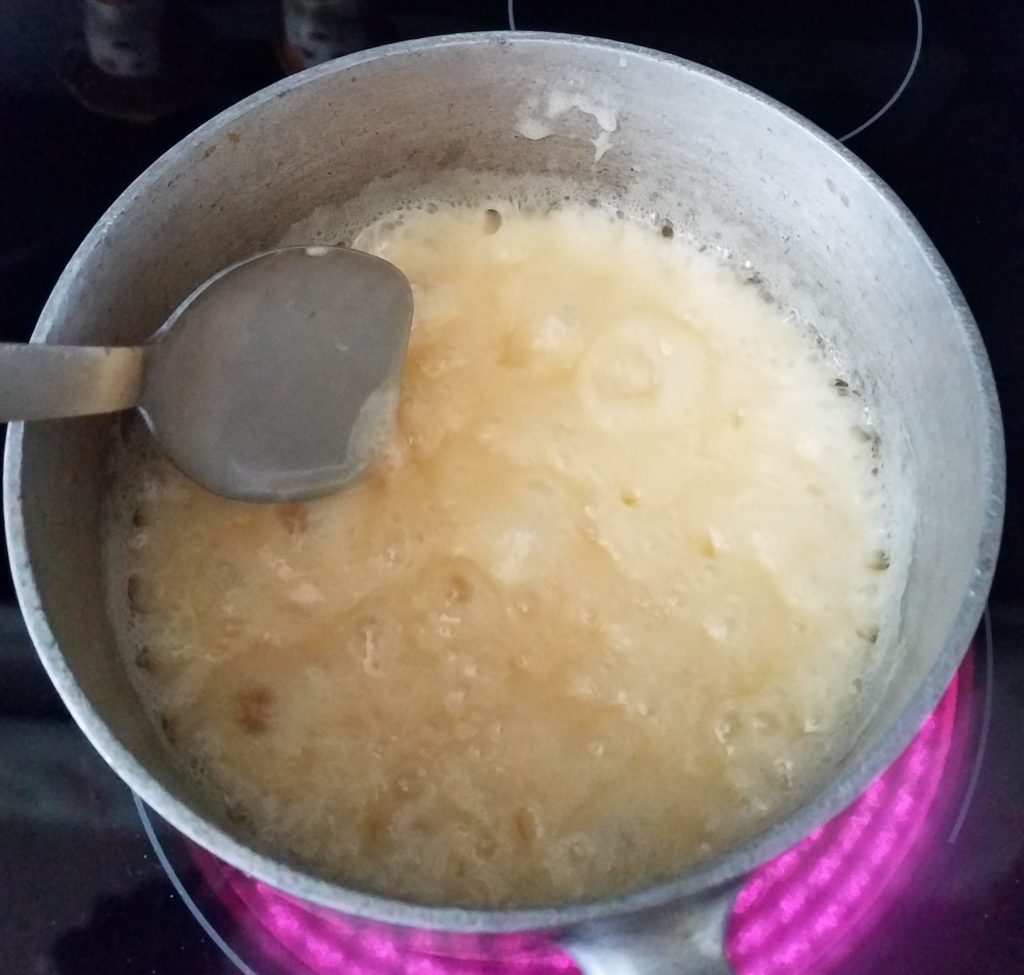
I prepped a 9×13 pan by lining it with parchment paper. There’s enough butter in the recipe so I’m not too worried about it sticking, but the parchment paper makes lifting it out of the pan and cutting it into squares so easy. Once the pan was prepped I was ready to start. In a medium size pan, I put a stick and a half of butter (3/4 cup) over a medium heat. When it was nearly melted, I added 3 cups of sugar and 2/3 cup of evaporated milk. I stirred it all together and kept an eye on it stirring periodically but not constantly. When it started a good rolling boil I set the timer for 5 minutes and stirred constantly. The newer version of the Fantasy Fudge recipe now calls for 4 minutes or 234 degrees on a candy thermometer. The original Fantasy Fudge recipe called for 5 minutes and that’s the one I still use. I don’t use a candy thermometer. I’ve never had to. 5 minutes makes perfect fudge!
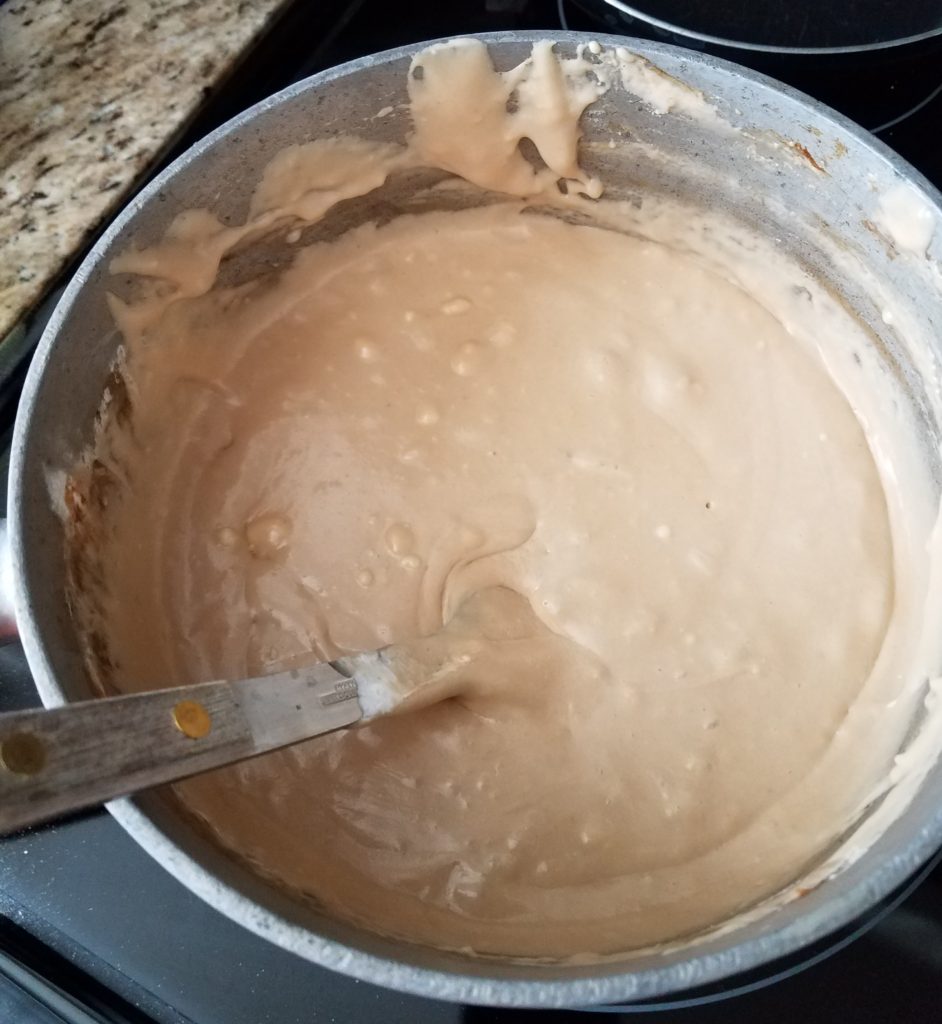
(When the 5 minutes is up, the fudge is obviously very hot so be cautious!) I removed the pan from the burner and now was the time to decide how much maple extract and salt I was going to use. Oh, the pressure! I landed on a tablespoon of maple extract and 1/8 tsp of salt. Then I added the white chocolate chips and marshmallow crème. I stirred until it was all melted and smooth. You can see in the photo it wasn’t quite melted yet. I just kept stirring until it was. You want to work fairly fast because the cooler it gets, the thicker it gets. This fudge sets up fast!
The last thing I added was the nuts. I just made sure they were all coated and then it was time to pour into my prepared 9×13 pan. If you have a second set of hands, they come in handy. The pan gets heavy (and it’s hot) when you’re trying to pour the fudge into the 9×13. It would be nice to have two hands to hold the pan and another hand to scrape out the fudge into the 9×13 pan. I didn’t have extra hands so I made do.
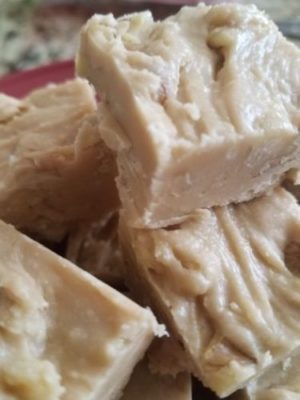
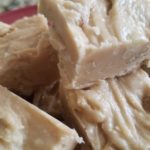
I can’t believe I didn’t get a picture of the fudge when it was all done and cooling in the pan! But I smoothed it all out and put it in the refrigerator until it was cool to the touch on the bottom of the pan. As I mentioned before, another fabulous thing about this fudge is that it sets up so quickly. When it was cool, I just flipped it out onto the counter and removed the parchment paper.
Next I cut it into squares and put it into a 2.25 qt Ziploc storage container that works great for the counter, refrigerator or freezer.
I love these containers. I use them for my homemade ice cream, baked goods, soups…pretty much everything!
The Moment of Truth!
Okay, so now that it was all done I had to taste it! I couldn’t give it to my mom if I didn’t like it! Well….(drumroll please) it was fantastic…but! My initial impression was — it needs more maple extract. But I didn’t want to be the only judge of that because I’d been smelling maple extract for an hour and I might midjudge. I took it over to my mom’s and according to my family….who are always available to critique whether I ask them to or not!! … I am to change nothing on this recipe! They absolutely loved it. I also couldn’t taste the salt so I think when I make it again I’m going to increase it to 1/4 tsp and see if that makes a difference. I think I’m a little afraid of the line between not enough and too much salt so I’ll add a quarter tsp at a time to see what the magic number is. But that’s just me. Again, my mom and the rest of the family raved about it and wouldn’t change a single thing on the recipe. If I do change the salt I’ll come back on here and update the recipe…
If you’re a maple nut fudge fan I think you’re really going to love this recipe. Next I think I’m going to have to try my brother’s favorite, peanut butter fudge! 🙂
Give this a try and let me know what you think.
Happy tinkering,
Susan
Fantasy (ish) Maple Nut Fudge
Ingredients
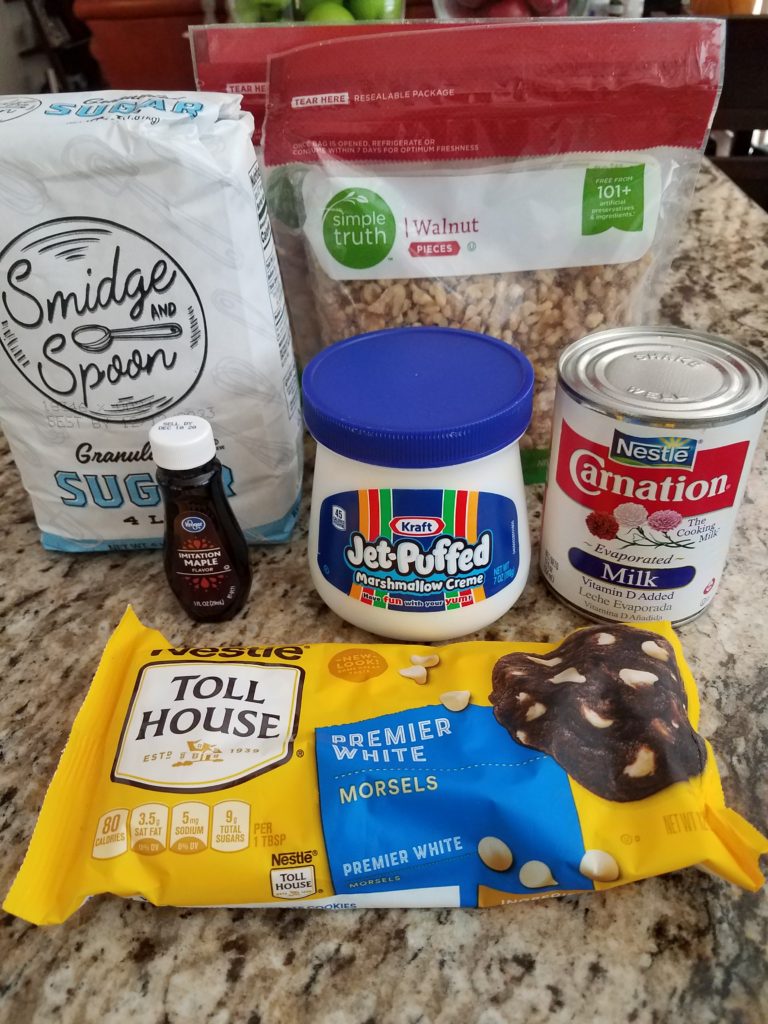
- 3/4 Cup Butter
- 3 Cups Sugar
- 2/3 Cup Evaporated Milk
- 1 tbsp Maple Extract
- 1/8 tsp Salt
- 12 oz White Chocolate Chips I used Nestle Toll House Premier White
- 7 oz Jar of Kraft Jet-Puffed Marshmallow Creme
- 12 oz Chopped Walnuts
Instructions
- Line a 9x13 pan with parchment paper
- In a medium pan, melt butter over medium heat and then add sugar and evaporated milk
- When the mixture comes to a rolling boil, set a timer for 5 mintues and stir constantly
- At the end of 5 minutes, remove from heat
- Add salt, maple extract, white chocolate chips and marshmallow creme and stir until melted and creamy
- Add walnuts and stir until combined
- Pour fudge into the prepared 9x13 pan and refrigerate until the bottom of the pan is cool to the touch
- Cut into squares and serve!

Would it work without chips? I have Maple chips and allergic to chocolate
I know white chocolate doesn’t have any chocolate solids but it sometimes has cocoa butter. Don’t know if that triggers your allergy but either way, I think maple chips might be great. I’ve never used them. I would be curious to know if the maple flavoring from the chips melds well with the maple extract. You’ll have to tell me when you try it!
When making the peanut butter fudge use real peanut butter not chips. Been making for years and everyone LOVES it !
Hi Betty…thanks for the tip. I could not agree more. Peanut butter chips can’t replace the flavor and richness of real peanut butter.
Made the maple pecan it is delicious used 1/4 to salt used 1 tbs + 1 tsp maple flavor. Thanks
I just made a batch yesterday too! Glad you liked it. Happy holidays.
Susan
In the Fantasy (ish) Maple Nut Fudge, do you use salted or unsalted butter?
Hi Pam,
I use salted butter in this recipe. Actually in almost all my recipes! 🙂 I hope you enjoy the fudge!
Susan
can i use maple syrup in this recipe
I have never tried maple syrup in it but let me know how it goes if you try it.
This fudge was amazing l didn’t have marshmallow crème so l used 7oz of regular marshmallows and it came out perfect ,we couldn’t stop eating it . Wonderful recipe Thank you 😊🥰
I’m so glad you enjoyed it!
What temperature should this be same as butter fudge 234 soft ball stage
Hi Debbie,
I don’t use a thermometer for the recipe. Once it gets to a rolling boil, I just set the timer for 5 minutes and it comes out great every time.
Could I use real maple syrup in this recipe, instead of maple extract?
I haven’t tried it with maple syrup. It might change the texture. Let me know if you give it a try!