
Welcome back to my Fixer-Upper Home Series!
Today, I’m sharing one of my favorite rooms in the renovation — my living room makeover. This once-dark, dated room is now a bright, welcoming space that feels like home.
If you missed it, check out the Dining Room Makeover on a Budget to see how these spaces flow together.
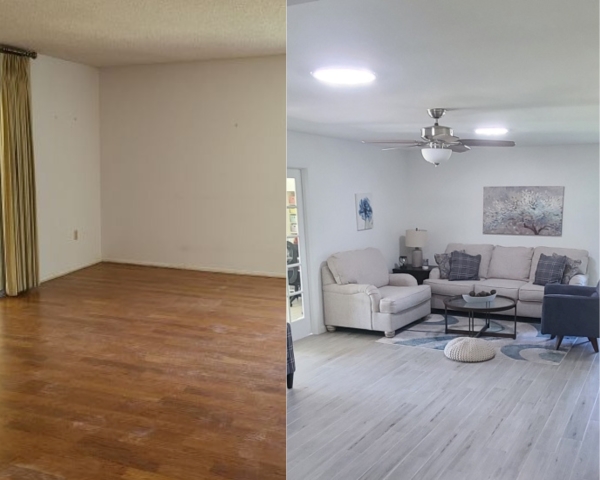
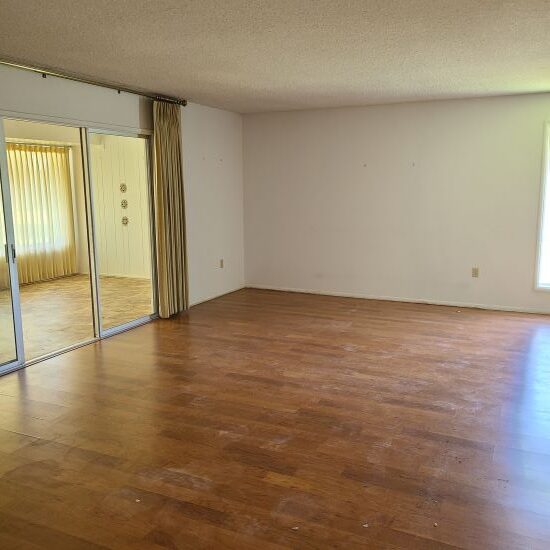
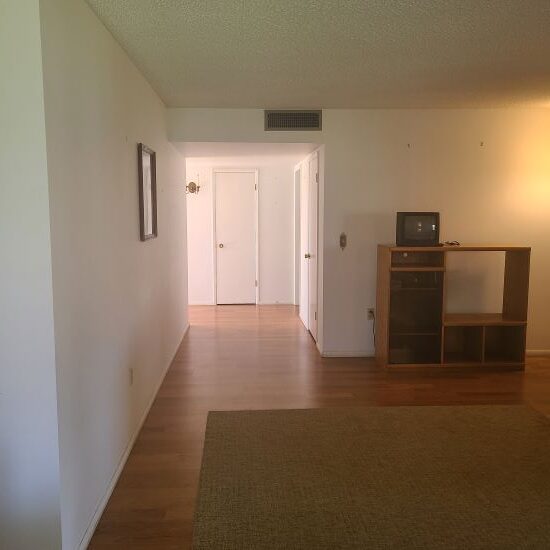
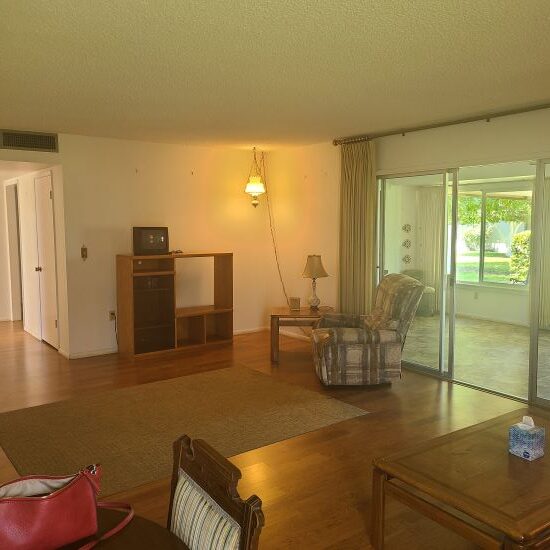
Before: Dark and Outdated
When I first walked through this 1969 fixer upper, the living room was the one space that gave me pause.
The layout was awkward, with nearly one full wall opening into the sunroom. And since this house didn’t have a separate family room, I knew this area would need to serve as the main gathering spot.
Here’s what it looked like before — not exactly cozy!

The Vision: Bright, Airy, and Budget-Friendly
My goal was simple: turn this living room into a bright, airy, and functional space on a realistic budget.
I wanted it to feel open and comfortable but still stylish enough to look intentional and cohesive with the rest of the home.
Key goals:
- Bring in more natural light
- Keep the color palette neutral with blue accents
- Choose budget-friendly pieces that look high-end
- Create a cozy but open seating layout
- Ensure everything flows into the dining room and sunroom
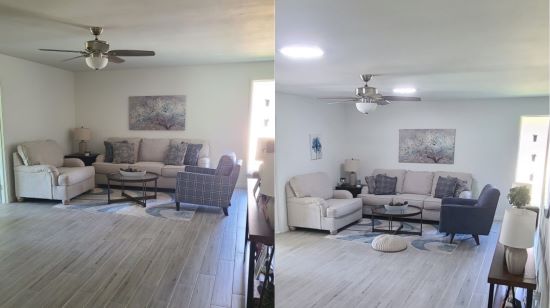
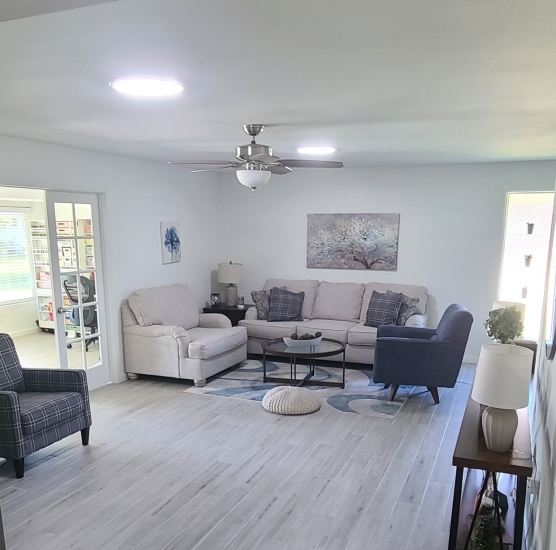
The Game-Changer: Solar Tube Lighting
The biggest transformation came from adding two solar tubes in the ceiling. Solar tubes are a type of skylight that channel natural sunlight from the roof into your home without the heat or glare of traditional skylights. They’re a great budget-friendly way to brighten a dark room — and they made a huge difference here.
Check out the before-and-after photos below — the light speaks for itself!
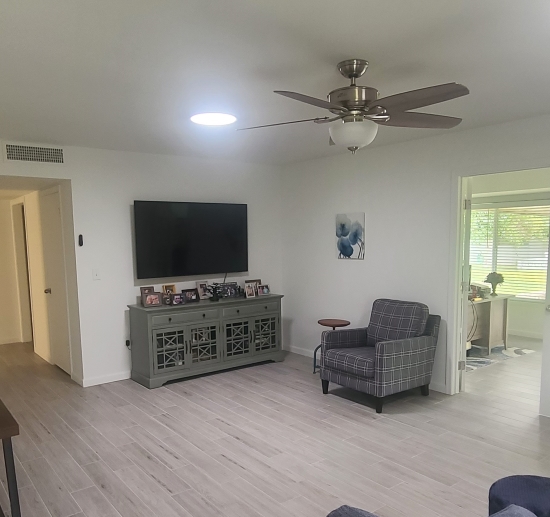
The Transformation
Flooring:
We replaced the worn laminate with wood-look tile in a pale gray tone, which now runs throughout the house for a seamless flow. It’s durable, easy to clean, and makes the room feel much larger.
I found this flooring at Floor & Decor — it’s called Carson Ash, and it’s perfect for modern, budget-friendly renovations.
Walls and Ceilings:
After removing the popcorn ceiling (good riddance!), I painted everything Sherwin William’s Pure White. It’s crisp, bright, and beautifully neutral. The new paint immediately made the living room feel fresh and open.
Layout & Furniture:
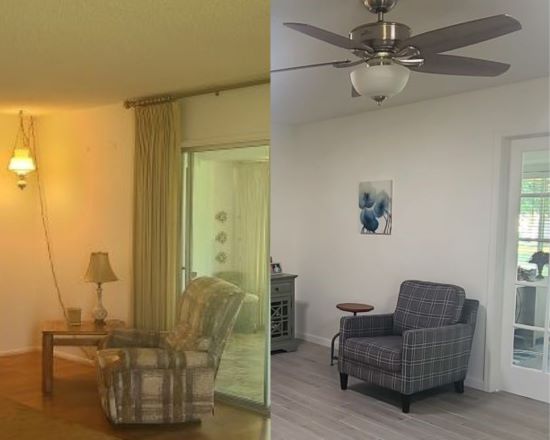
The original layout felt too open to the sunroom. I wanted natural light from that area but needed the rooms to function separately.
We removed the old sliding glass doors, framed part of the wall, and added French doors — the perfect blend of light and structure.
Now for the fun part — furnishing the new space!
- Sofa & Chairs: The Traemore collection from American Furniture Warehouse gave me the light, comfortable look I wanted. The plaid pillows inspired the room’s blue accents.

-
Swivel Chair: A La-Z-Boy favorite — not originally in the budget, but worth every penny.

-
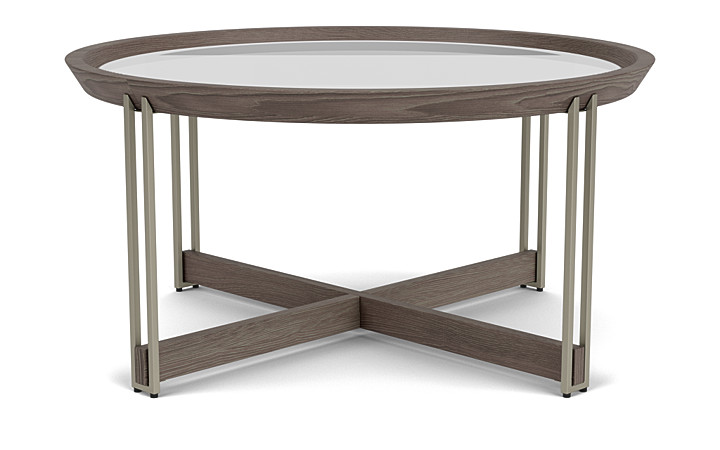
Coffee Table: The Elora round glass and walnut table (from Mor Furniture) keeps things light.
-
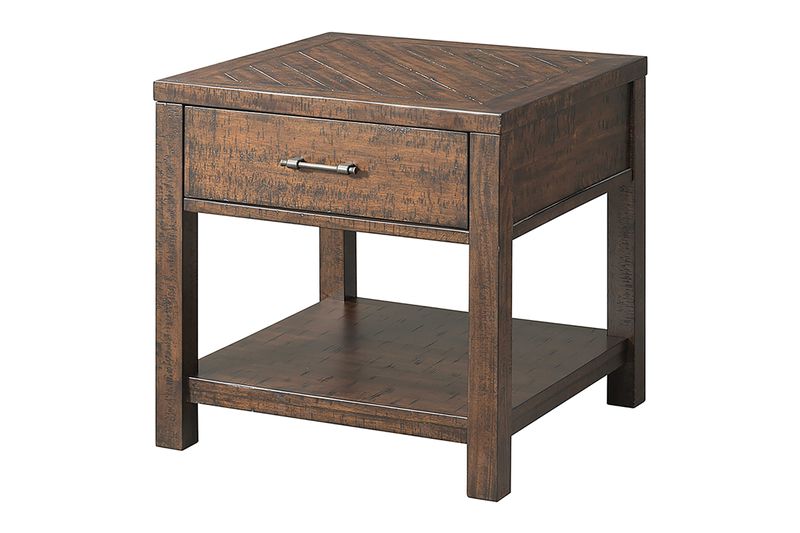
End Table: The Dex table adds warmth with walnut tones.
-
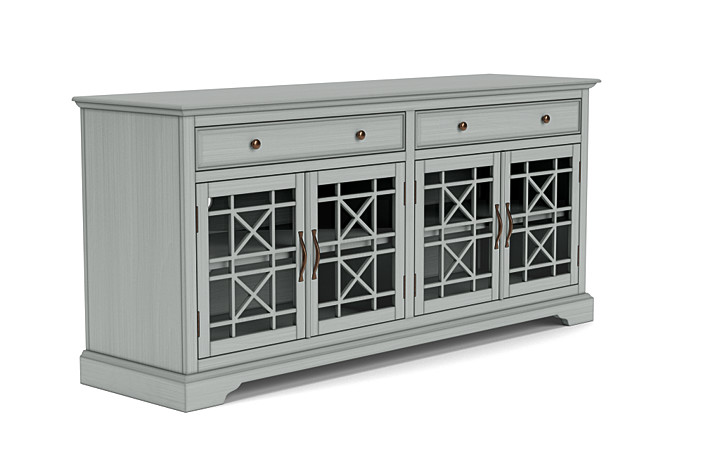
TV Console: The Skyy console from Mor Furniture anchors the 65″ Samsung TV from Best Buy.
-
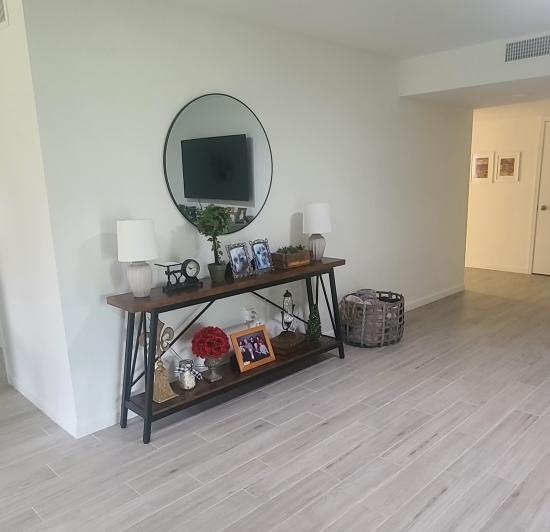
Sofa Table: A slim console from Bed Bath & Beyond perfectly fits the narrow wall.

-
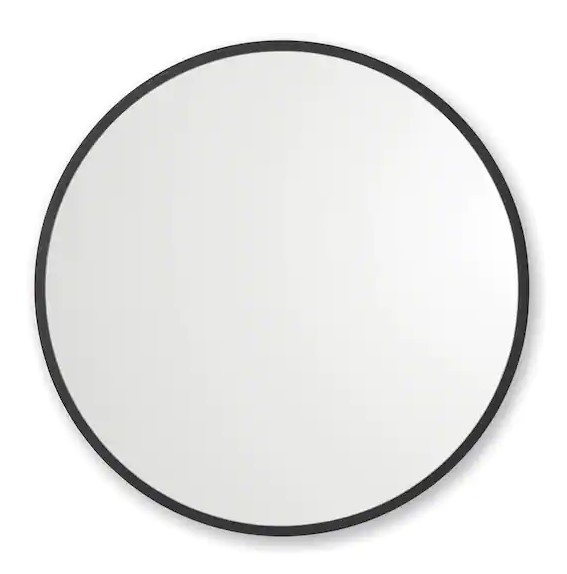
Mirror: A simple round mirror from Home Depot completes the look.
Art and Accessories:
For artwork, I chose A Thousand Silver Lifetimes from Bed Bath & Beyond. The soft, abstract tones pull the entire room together.

Underfoot, a Tribeca Slade rug from Home Depot adds texture and subtle blue tones to echo the rest of the décor.

These details give the space character while keeping everything light and cohesive — exactly what a fixer upper living room makeover should be.
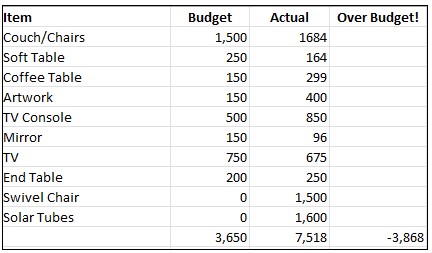
Budget and Lessons Learned
This living room remodel was a little tough on the budget — mainly because of the solar tubes and swivel chair — but I don’t regret either decision. Both added tremendous comfort and value to the home. I’d budgeted $3,650 and spent $7,518, a little more than double the budget! Yikes!
The Final Reveal
Boom!

One more room checked off the list! Are you remodeling a fixer-upper? Let me know how it’s going in the comments.
Happy tinkering,
Susan
