
I used some American Express points a few years ago and ordered a Cuisinart Ice Cream Maker for free!…strictly for the sorbets and frozen yogurts of course…ha! My sister asked me if I could make a Coffee Toffee Ice Cream for her birthday so I started with a very basic vanilla recipe and then I just added some espresso powder and heath bars. I had no idea how it would taste. I’m one of those weird people who doesn’t like coffee so I’m the last person who could judge it. But I served it for her birthday and boy was it a hit! So now I have to make it for her every year…and I make an extra batch for her to take home.
This post contains affiliate links. See our disclosure here.
I love my Cuisinart. It makes a half a gallon at a time and the whole process is so easy and fast. I keep the tub in the freezer so when I’m ready to make ice cream I just take it out, throw the ingredients in there and 25 minutes later I have ice cream…uh, I mean sorbet. I have tried to make two batches back to back, but the bucket is too melted for a second batch. You need to put it back in the freezer and let it get fully frozen before you try a second batch.
I have been posting alot of Weight Watchers friendly recipes lately so I almost feel guilty for sharing this recipe….because let me tell you, it is not Weight Watchers friendly! 🙂 But if you’re game, here is how to make my Coffee Toffee Ice Cream. And please note, the “how-to” part of the recipe is specific to the Cuisinart. If you have a different ice cream maker you may need to adjust the settings and time it takes to make.
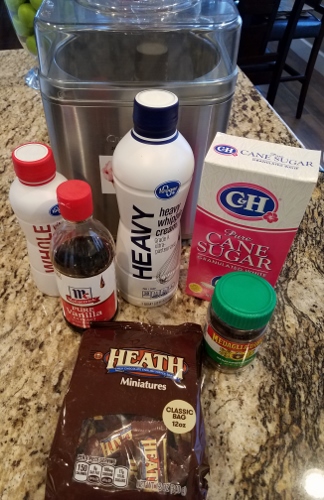
Here’s what you’ll need…
- 1 1/2 cups of Whole Milk
- 1 1/8 cups of Granulated Sugar
- 3 cups of Heavy Cream
- 1 1/2 tbsp Vanilla Extract
- 4 tbsp Instant Espresso Powder
- 12 oz Mini Heath Bars
- Plastic Storage Container
Here’s how you’ll make it…
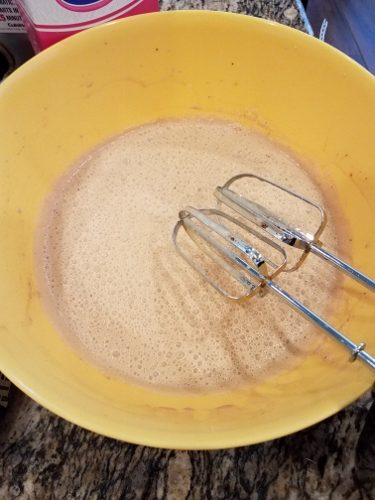
- In a large bowl, mix the granulated sugar and milk with a hand mixer. I use a large bowl because it has potential of splattering.
- Add the heavy cream, vanilla and espresso powder and mix well.
- Pour into the ice cream maker and let it churn for 15 minutes.
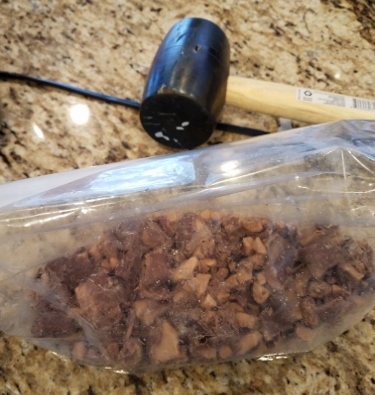
- In the meantime, unwrap your mini heath bars and put them in a ziploc bag.
- Using a mallet, beat them! 🙂 I use this method because my sister likes big chunks of toffee in her ice cream. If you want smaller pieces you might want to put them in a food processor.
- When the ice cream has been churning for 15 minutes, add the toffee pieces.
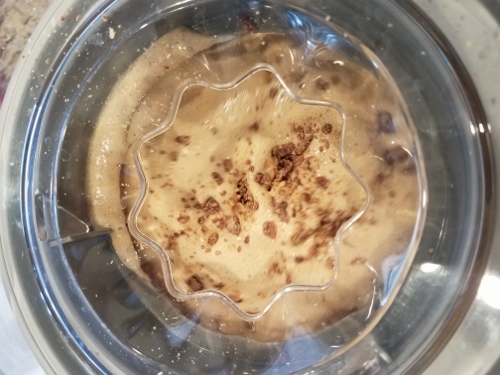
- Churn for another 10 minutes.
- At the end of the 25 minutes, the ice cream will be soft and creamy.
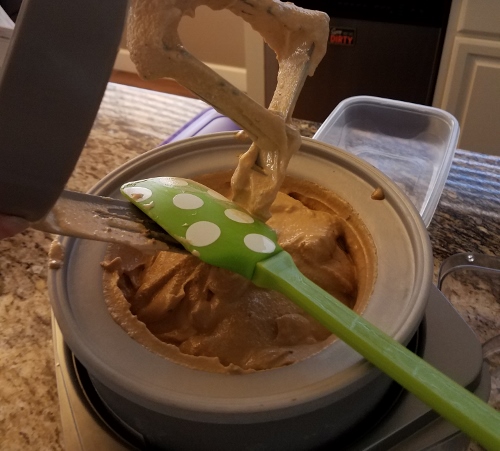
- Pour the finished Coffee Toffee Ice Cream into a plastic container and put it in the freezer. I use a container that’s larger than 2 quarts since I am adding the chunky ingredients to it.
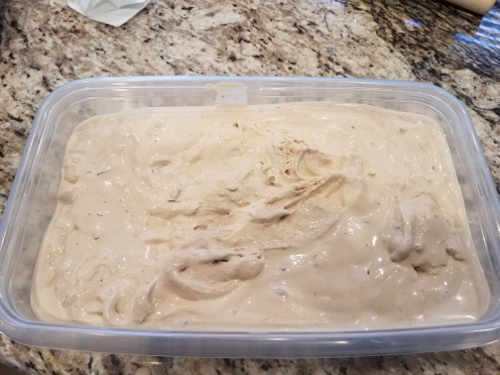
I like to let it freeze overnight. It firms it up, but it’s still very creamy when you dish it out.
I hope you enjoy this sweet treat. Let me know how you like it.
Happy tinkering,
Susan

Coffee Toffee Ice Cream
Ingredients
- 1 1/2 cups Whole Milk
- 1 1/8 cups Granulated Sugar
- 3 cups Heavy Cream
- 1 1/2 tbsp Vanilla Extract
- 4 tbsp Instant Espresso Powder
- 12 oz Mini Heath Bars
Instructions
- Combine milk and sugar in a large bowl.
- Using a hand mixer on low setting, blend until sugar is dissolved.
- Add cream, vanilla and espresso powder and blend until all ingredients are combined.
- Pour mixture into ice cream maker and churn for 15 minutes.
- While mixture is churning, coarsely chop the toffee pieces.
- When ice cream has been churning for 15 minutes, add toffee pieces.
- Continue to churn for another 10 minutes.
- Freeze overnight for best results, or a minimum of 2 hours for softer ice cream.
