
The next project in my fixer upper – the kitchen!
This post contains affiliate links. See disclaimer here.
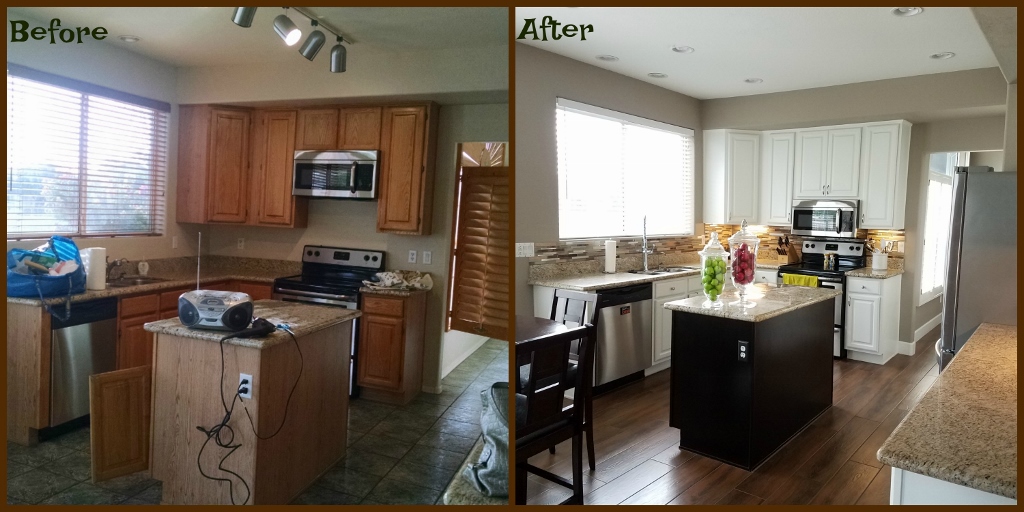
The kitchen was much like the bathrooms…bad. Builders grade oak cabinets, green tile floor (my God, how much of that tile did the previous owner buy!?), bad lighting, and a microwave you had to be 7 feet tall to use. The beauty of the kitchen is that almost everything it needed was cosmetic and some of it I could do myself. The changes I wanted done were:
- Update the cabinets and island
- Change out the blinds
- Remove the existing lights and exchange for recessed lighting
- Paint the walls
- Add a backsplash
I already had someone painting the entire interior of the house and replacing the downstairs flooring… so the kitchen was just part of those two projects. That left the cabinets, the island, the lighting, the blinds and the backsplash for me to deal with and the blinds were easy because the window was a standard size so I just ordered the new blind when I ordered the rest of the ones for the house.
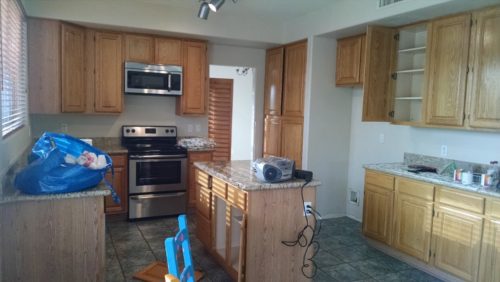
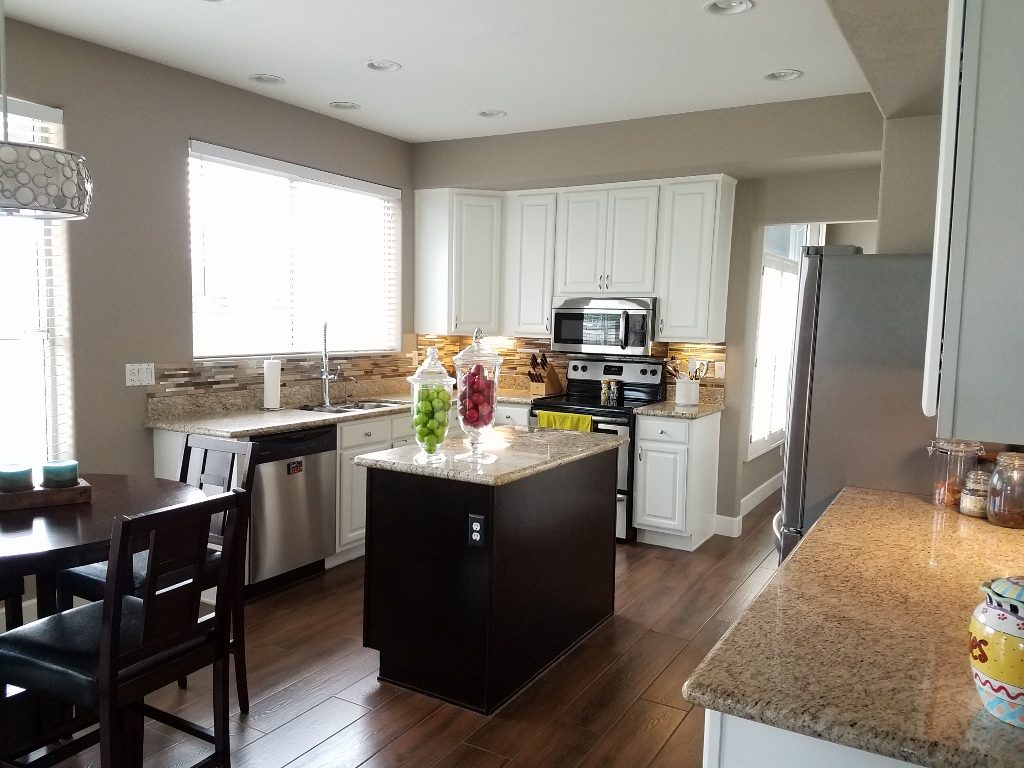
The countertops were brand new and a neutral color so I knew I could make them work. I’m told the countertops used to be the same green 12×12 tiles that was on the floor (really??) but the realtor told the previous owners she wouldn’t even list the house unless they changed out the counters! Probably a smart move but it wouldn’t have deterred me from buying the place.
On to the cabinets…
Did you know you can order your items from your local Home Depot store online and they’ll gather them up and bring them to the front of the store for you? I am obsessed with this service. I use it all the time. It keeps me from having to wander the aisles looking for things, or searching for an employee to help me find something…and it keeps me from impulse buying!
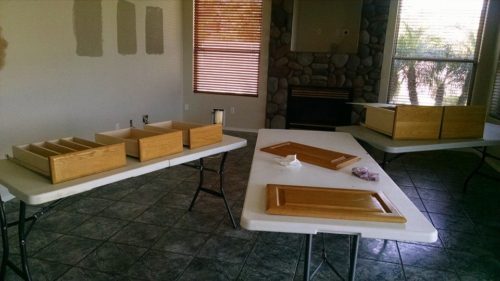
The cabinets were in great shape. They just needed some love so I prepped them and decided to paint them white. The only thing I didn’t like about them is they had exposed hinges. I prefer the European style concealed hinges so I bought enough new hinges for all the cabinets (Home Depot has them in packs of 10 for a great price), bought the drill bit we needed to adjust the cabinet hinge type and asked my trusty handyman to do all the work. 🙂 It’s not hard, just time consuming and if I ever wanted to move in, I had to delegate some things. Oh wait, that reminds me…one more thing I didn’t like about the cabinets is they had no door/drawer pulls. And because I hate to install pulls — again, not because they’re hard to do but because they’re insanely boring to install — I asked the handyman to install those for me too. I did the ones in the bathrooms myself and I just couldn’t do any more. If you want to install your own, a template is a must. It makes it so easy!! You just put the template on the cabinet, mark the holes, drill where the marks are, and you’re done!
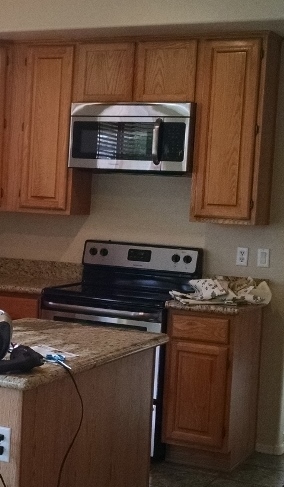
I’m not sure what the story was behind the microwave. It was mounted to this small cabinet above the stove and it was so high I literally couldn’t see inside it. It was so weird! I needed to fix the situation so I looked online at Home Depot to see if they had a cabinet with the same face and they did! So I bought a larger cabinet and my handyman mounted it for me, then mounted the microwave to the new cabinet. One more thing one!
To prep the cabinets I gave them a good scrub with a degreaser. I’ve used different brands in the past but this time I used Goo Gone brand and I really liked how it cleaned. Then I lightly sanded the cabinets with 80 grit sandpaper just to get enough sheen off them to allow the paint to stick. After they were sanded I used a tack cloth to remove the dust from the sanding. The cabinet prep is a tedious process but if you don’t prep the cabinets before painting, you run the risk of the paint not sticking. I learned that lesson the hard way years ago!
Painting the cabinets can be done with a sprayer or foam roller. The sprayer is easier but I don’t have good luck with sprayers. It’s not the sprayer…it’s me. So I always take the more time consuming approach of rolling the paint on. It’s important to use a foam roller instead of a brush or textured roller to ensure a smooth and finished look. I use a brush for inside corners but I use the foam roller for everything else. There used to be an unwritten rule that cabinets had to be painted with oil based paint. While that is arguably still the preferred way to go for many people, a good quality premium latex paint is easier to work with and much easier to clean up so I use latex paint. But because I use the latex paint, I always prime the cabinets first with Kilz. This process has always worked well for me and my cabinets have always come out great.
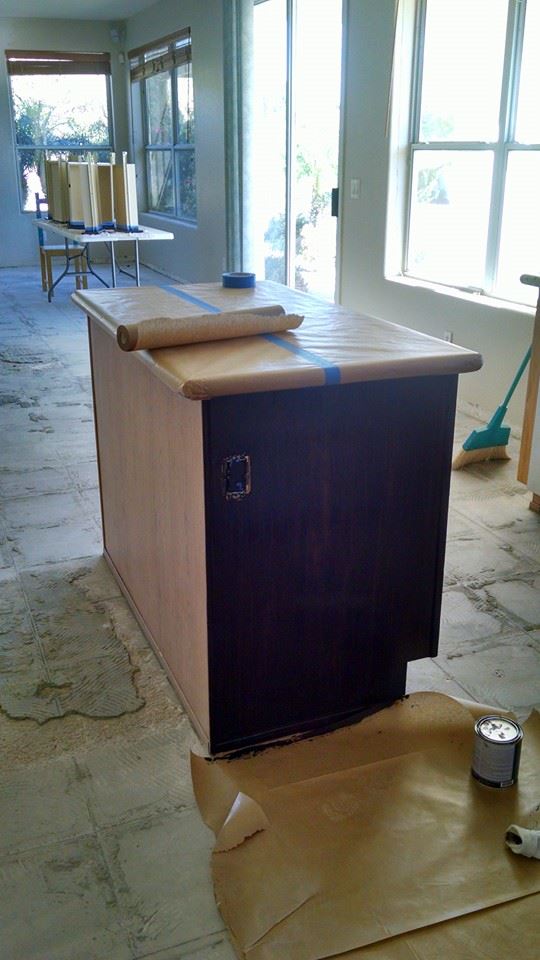
Next, the island…
When the cabinets were done it was time to decide what to do with the island. I wanted something different so instead of painting it white like the cabinets I stained it with General Finishes Java Stain…also seen here in my bathroom makeover and the tutorial here .
At the same time that I was dealing with the cabinet painting and island staining I needed to make some decisions about the lighting. I wasn’t a big fan of the spotlight fixture above the island so I opted to have it removed and then add recessed lights throughout the kitchen ceiling. It was a much cleaner look and the light is disbursed throughout the room.
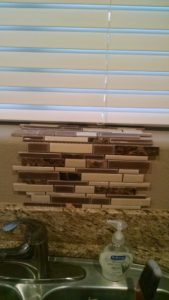
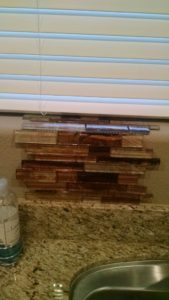
And finally, the backsplash…
The kitchen was done and I was all moved in before I had time to deal with the backsplash. I shopped around and brought some samples home to see how they looked in the space. I had a windowsill above the sink so I just draped the samples over the window to see which one I liked best.
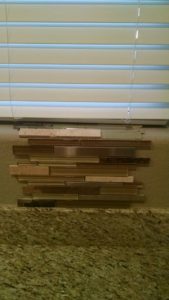
I’d never installed a backsplash before so the next thing (and smartest thing!) I did was enlist my friend Jeanette to help me. She did her own and was a seasoned pro! I bought all the supplies, we picked the weekend and I rented a wet saw. It was go time!

It was a beautiful weekend and I put the wet saw out on the back patio. I kept the sliding glass door open to make it convenient because one of us was constantly out making cuts in the tile. This all sounded like a good idea at the time but there are just some things in life you can’t anticipate. For the most part, she focused on one wall while I focused on another, but at one point Jeanette was behind the stove and I was leaning over the stove, both of us working in one area. I happened to stand up and glance into the family room and the little guy in the picture below was standing right in the middle of the room looking at us! He was a frequent visitor in the backyard. So frequent in fact, that I named him — Frazier Crane. 🙂 But this time I guess he wasn’t satisfied with hanging in the backyard. He just walked right in like he owned the place. I had to hurry up and shoo him out before the dogs discovered him. I don’t even want to think about what would have happened then…

So once Frazier was back where he belonged we continued to work our way around the room, installing the backsplash.
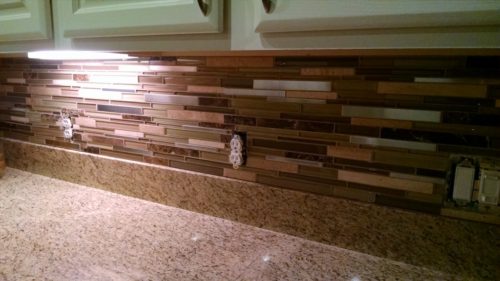
On the second day we grouted the tile. And here’s a little tip from me to you. If you’re working with tile that has strips of metal in it, be cautious around the outlets when using a wet sponge to wipe away the excess grout. I shocked myself not once…but three times — at the same outlet! I apparently thought I could do the exact same thing and expect a different outcome each time. It’s a good thing I’m insured…
So that’s it! One more room finished! Leave me a comment and let me know your thoughts…
Happy tinkering,
Susan
